
25 Easy Hairstyles for Kids That Take 5 Minutes or Less
Some mornings, getting everyone out the door feels like a race against missing shoes, unfinished breakfast, and a hairbrush that has disappeared again. Your child’s hairstyle should be the easy part.
These easy hairstyles for kids give you simple options for school, playdates, and everyday outings. You’ll find ponytails, beginner braids, soft buns, quick curl arrangements, and short-hair styles that don’t need heated tools. Choose by hair length and texture, then let your child pick a favorite.
A quick note about timing: The times below are estimates for styling hair that is already detangled and ready to work with. They do not include washing, drying, a full curl refresh, or creating an existing set of twists or braids. Beginners, very long or thick hair, and children who need breaks may need more than five minutes. Comfort comes before the clock.
Before You Start: Make Styling Easier
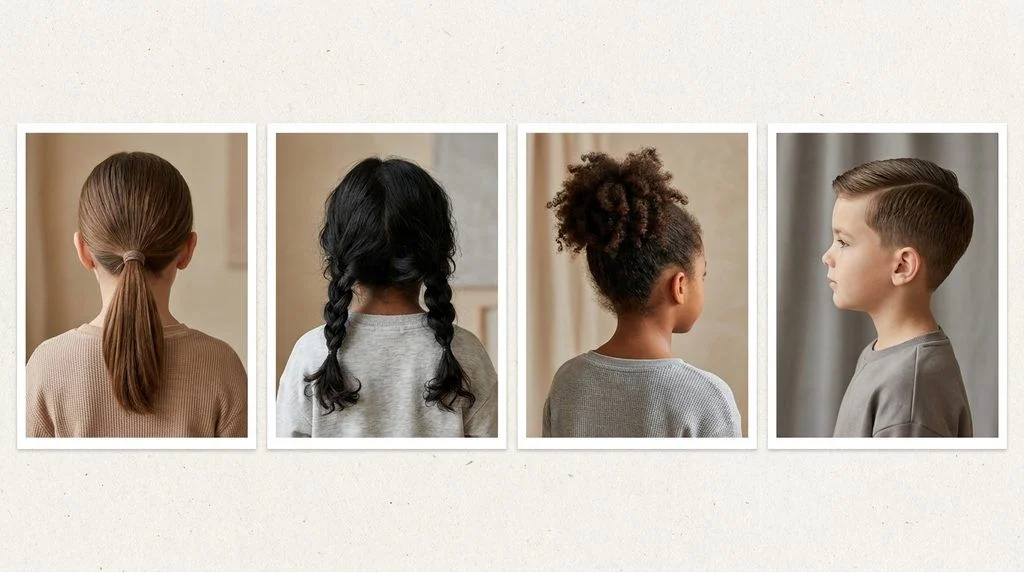
Put a comb or brush suited to your child’s hair, soft hair ties, a few age-appropriate clips, and a scrunchie in one small basket. Having everything within reach saves searching halfway through a ponytail.
Use your child’s usual detangling routine before you begin. For curls and coils, work with their natural shape rather than brushing them flat just to copy a picture. A slightly uneven part or a few flyaways do not need fixing.
Choose accessories your child can wear comfortably. Keep small clips and elastics away from children who put objects in their mouths, and remove accessories before sleep. If a style feels tight or hurts, loosen it or choose another one.
For a quick choice:
- Short hair: Try the side part, finger-styled texture, or side clips.
- Medium hair: Start with a low ponytail, half-up ponytail, or low pigtails.
- Long hair: Try a side braid, bubble ponytail, or loop bun.
- Curly or coily hair: Consider a loose puff, two puffs, or a soft headband.
- Existing twists or braids: Gather part of the finished style into a loose half-up ponytail.
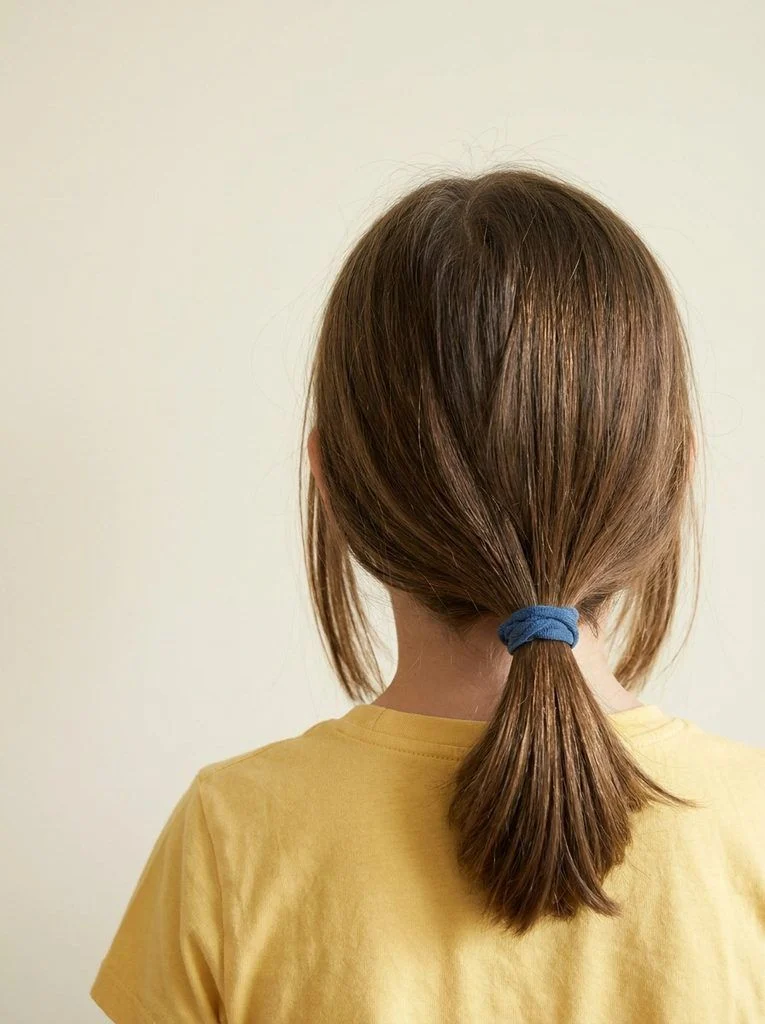
1. Classic Low Ponytail
Estimated time: 1–2 minutes
Best for: Hair long enough to gather at the nape
You need: One soft hair tie
A low ponytail is a useful starting point when your child wants all their hair gathered without a complicated style. Keep the top relaxed instead of spending the morning chasing a perfectly smooth finish.
How to do it:
- Follow the hair’s natural part or gently sweep it backward.
- Gather the hair at the nape while your child holds their head upright.
- Secure with a soft tie, then check that turning their head feels comfortable.
Make it easier: If the sides are too short to reach, choose a half-up style instead of pulling harder.
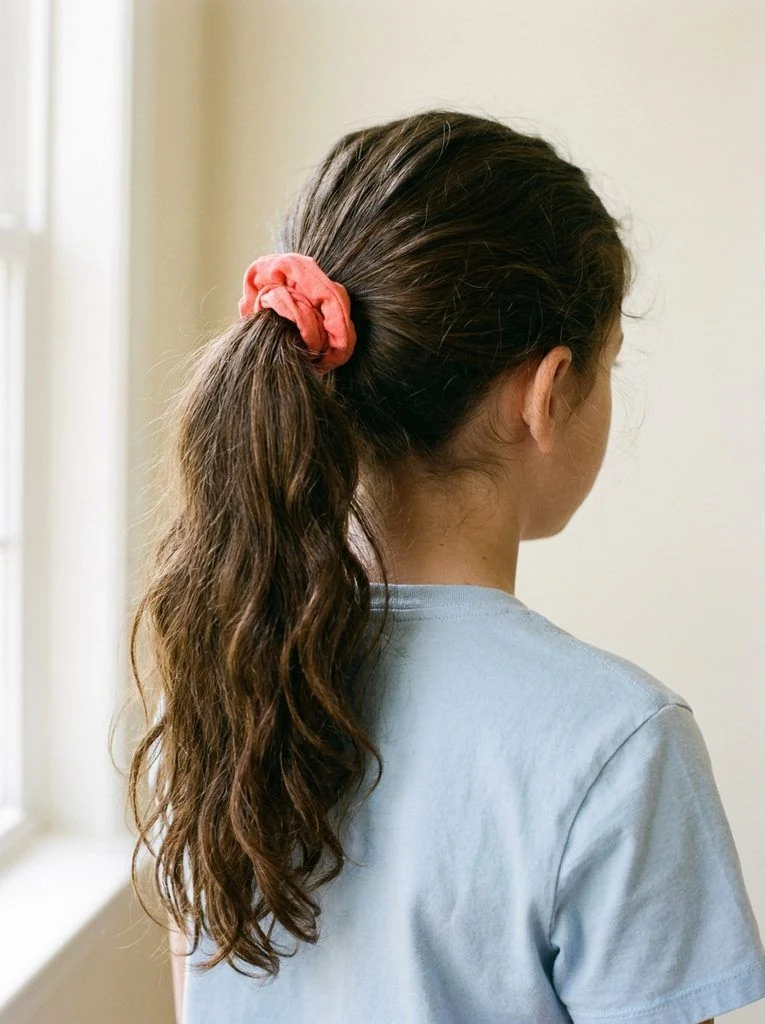
2. High Ponytail
Estimated time: 2–3 minutes
Best for: Medium to long hair
You need: One soft hair tie or scrunchie
This lifts the loose length away from the neck and gives a different look with the same basic ponytail skills. Choose a height the hair reaches easily; it doesn’t have to sit directly on top of the head.
How to do it:
- Gather the hair toward the upper back of the head.
- Smooth only the outside with your hands or a suitable brush.
- Secure the ponytail and gently release any sections that feel pulled.
Make it easier: For a heavy ponytail that keeps slipping, lower its position rather than repeatedly tightening the tie.
3. Half-Up Ponytail
Estimated time: 1–2 minutes
Best for: Bobs through long hair with front sections that reach backward
You need: One small snag-free hair tie
For a child who likes wearing their hair down, this gathers just the front portion. It is also an easy option when the bottom layers are too short for a full ponytail.
How to do it:
- Pick up a small section from each temple.
- Bring both sections to the back, leaving the lower hair loose.
- Join them with a hair tie without flattening the natural texture.
Make it easier: Use less hair if a large upper section feels bulky. The goal is simply to move the front pieces back.

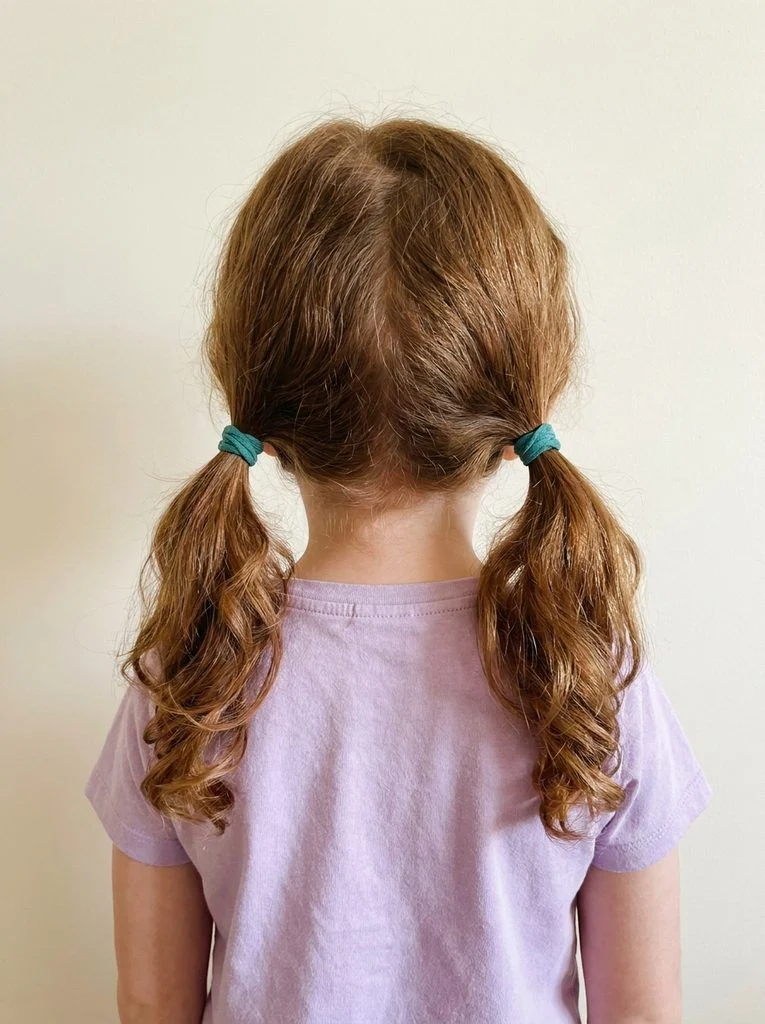
4. Two Low Pigtails
Estimated time: 2–3 minutes
Best for: Medium hair and shorter lengths that reach behind the ears
You need: Two soft hair ties
Two lower gathering points can work when one central ponytail leaves too many short pieces behind. This is a straightforward option for children who like matching accessories.
How to do it:
- Divide the hair into two sections from front to back.
- Gather one section low behind the ear and secure it.
- Repeat on the other side, checking that both feel comfortable.
Make it easier: A finger-made part is fine. You don’t need to redo the whole hairstyle for a slightly crooked line.
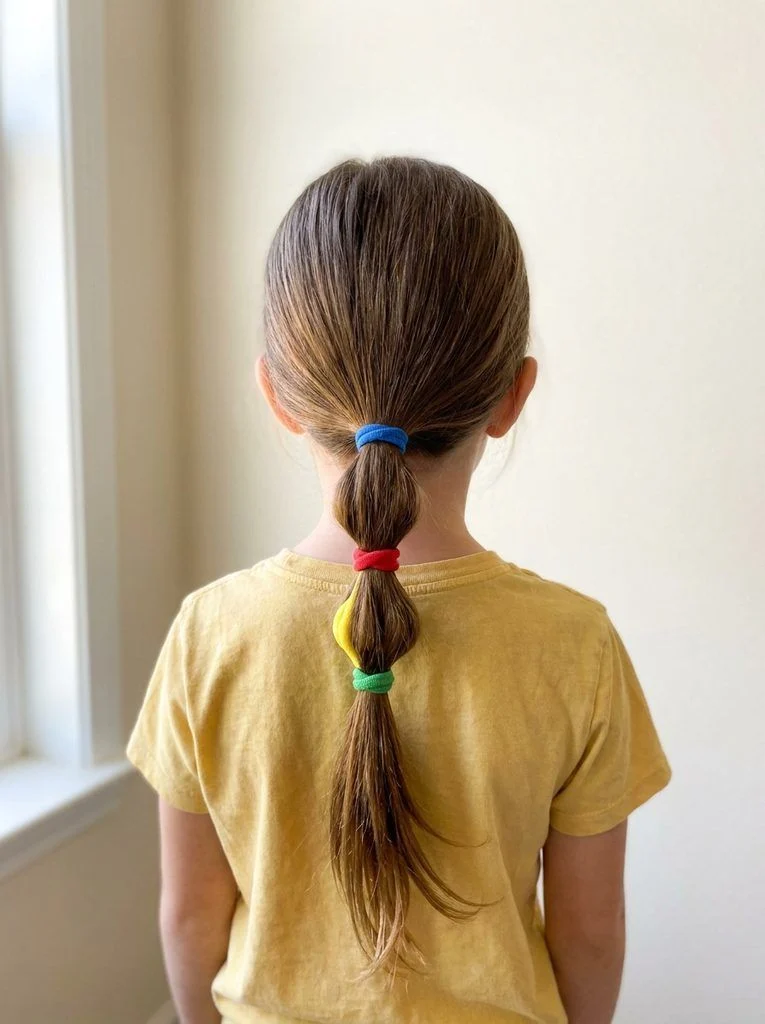
5. Bubble Ponytail
Estimated time: 3–4 minutes
Best for: Medium to long hair
You need: Three or four snag-free hair ties
A bubble ponytail creates separate rounded sections without any braiding. Keep the number of bubbles small when you’re short on time.
How to do it:
- Make a comfortable ponytail at the back of the head.
- Add another tie a few inches below the first, then one or two more down the length.
- Gently spread each section sideways to create a soft bubble shape.
Make it easier: Leave the bottom few inches loose. Shorter hair may only need two bubbles, and the sections don’t have to be perfectly equal.
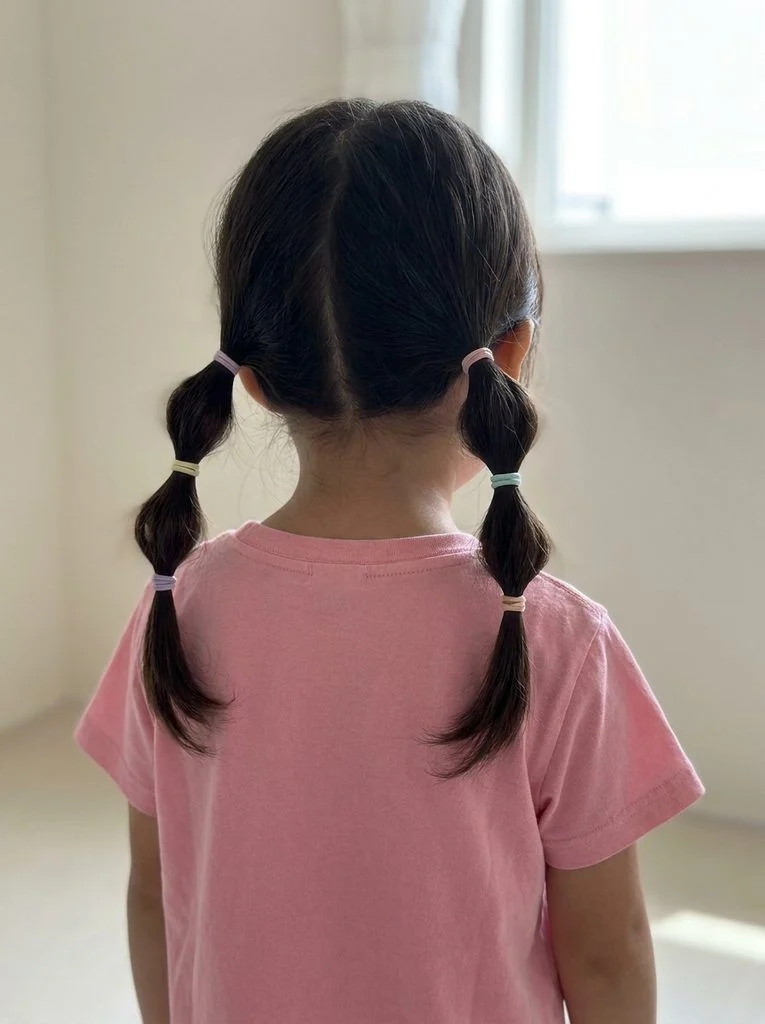
6. Double Mini Bubble Pigtails
Estimated time: 4–5 minutes
Best for: Shoulder-length to moderately long hair
You need: Six small snag-free hair ties
These short bubble pigtails add playful detail without turning into a long styling project. Two bubbles on each side are enough to make the shape clear.
How to do it:
- Make two low pigtails.
- Add two more ties down each pigtail, leaving space between them.
- Gently widen the sections between the ties.
Make it easier: Set out all six ties first. For very long hair, leave more length loose rather than adding bubbles all the way to the ends.
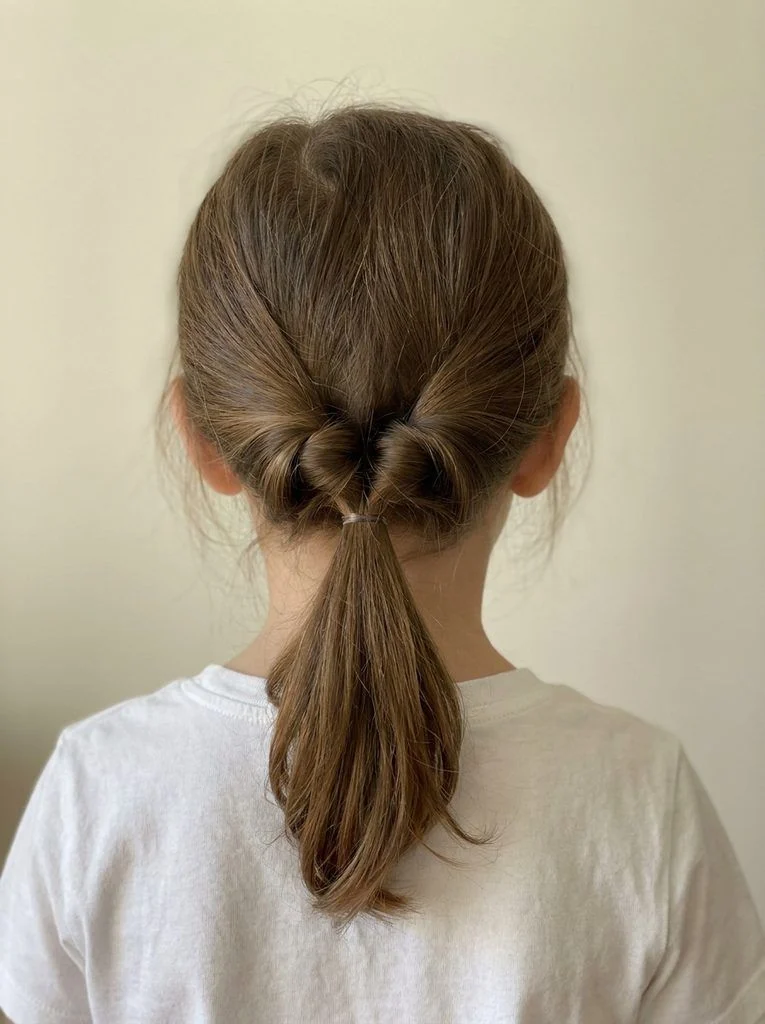
7. Topsy-Tail Low Ponytail
Estimated time: 2–3 minutes
Best for: Medium to long hair that passes easily through a loose opening
You need: One soft hair tie
One flip gives a plain ponytail a gently twisted finish. There is no need to repeat the movement several times; a single turn creates the shape.
How to do it:
- Make a loose low ponytail and slide its tie slightly downward.
- Use your fingers to open a gap in the hair just above the tie.
- Lift the ponytail up, guide it down through the gap, and settle it gently.
Make it easier: Keep the gap wide enough that the hair passes through without catching. Skip this option if threading the hair causes tangles.
8. Loose Side Ponytail
Estimated time: 1–2 minutes
Best for: Long hair and medium hair with few short layers
You need: One soft hair tie
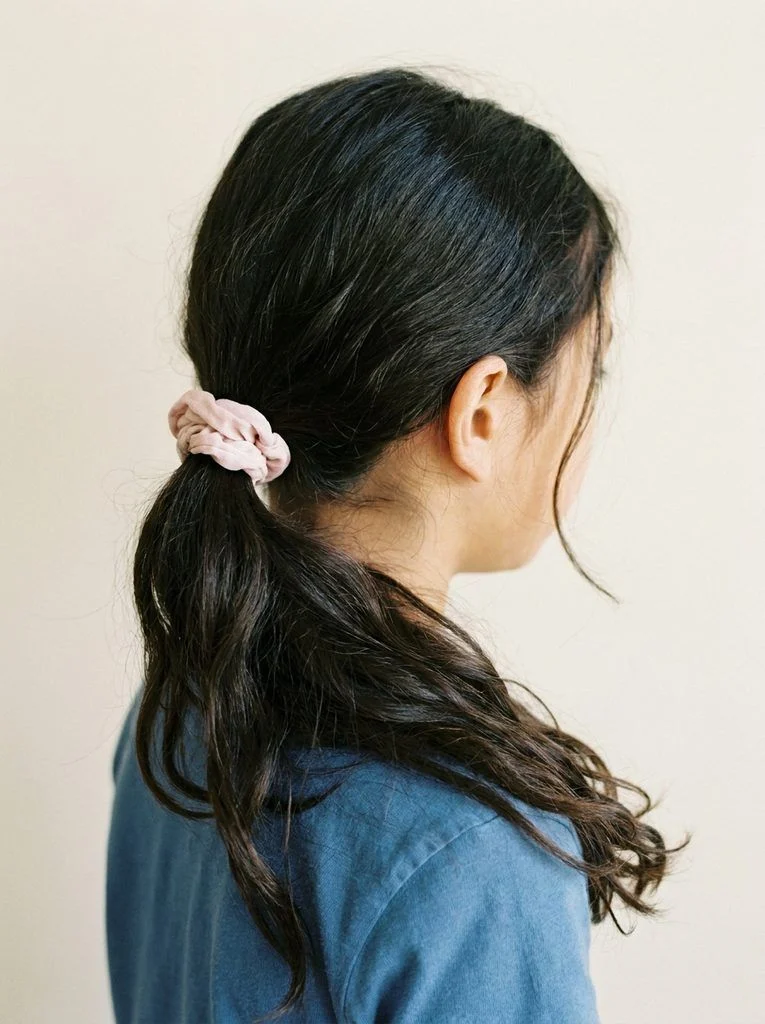
A side ponytail is easy for a child to see in the mirror and simple to decorate with a favorite scrunchie. Keep it low so hair from the opposite side reaches without stretching.
How to do it:
- Bring the loose hair over one shoulder.
- Gather it just below and slightly behind the ear.
- Secure it, leaving the hair across the back of the head relaxed.
Make it easier: Let your child choose the side. If hair slips out across the nape, return to a centered low ponytail.
[Image placement: Finished hairstyle]
Image prompt: Photorealistic portrait 4:5 side-rear view of a child with long dark wavy hair gathered into a loose low side ponytail behind the left ear, falling over the left shoulder. Pale pink scrunchie, blue everyday shirt, relaxed roots, neutral cream background, soft daylight. Entire ponytail visible. No text, logo, or watermark.
Alt text: Loose side ponytail falling over one shoulder with a pink scrunchie.
9. Simple Three-Strand Braid
Estimated time: 3–5 minutes
Best for: Medium to long hair; basic braiding experience helps
You need: One small hair tie
A basic braid gathers the loose length into one plait. It is a useful technique to practice on a relaxed afternoon before adding it to a rushed morning.
How to do it:
- Gather the hair at the nape and separate it into three sections.
- Cross the right section over the middle, then the left section over the new middle.
- Repeat down the length and secure the end.
Make it easier: Stop a few inches above the ends. Very long or dense hair can take longer, so choose a ponytail when time is especially tight.
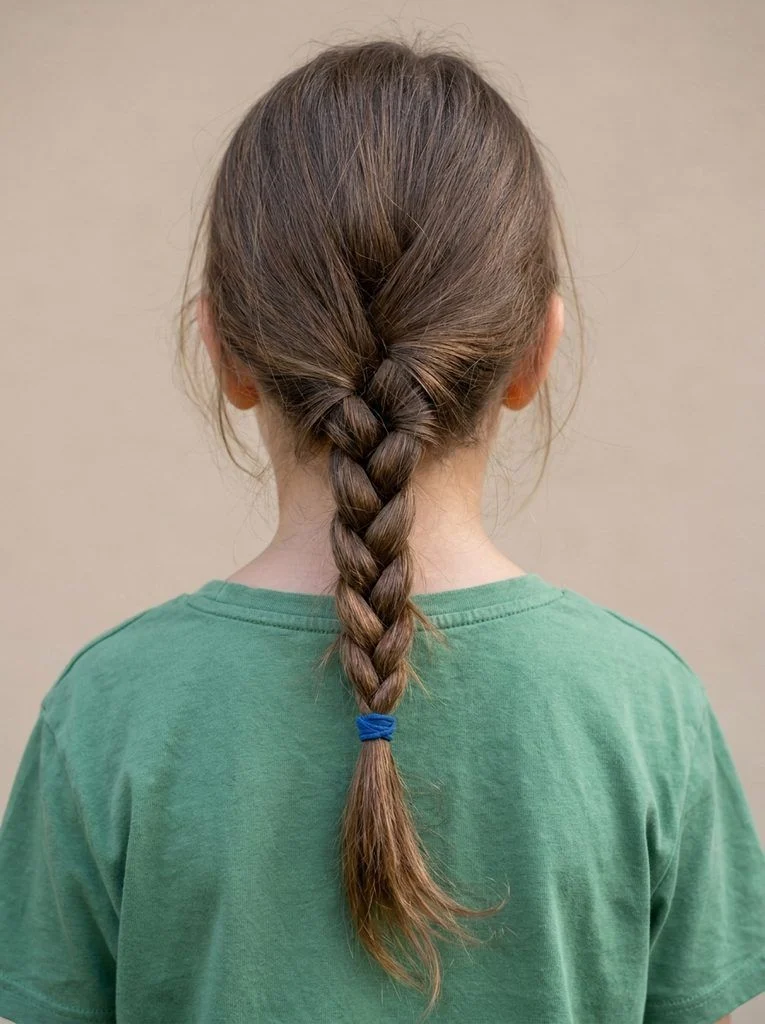
10. Easy Side Braid
Estimated time: 3–5 minutes
Best for: Long hair with limited layering
You need: One hair tie
Moving a braid to one side lets an older child see more of the work while practicing. It also gives the familiar three-strand braid a different placement.
How to do it:
- Bring the hair over one shoulder.
- Divide it into three fairly equal sections below the ear.
- Alternate the outer sections over the middle, then secure the end.
Make it easier: Start low rather than trying to braid around the side of the scalp. Leave shorter face-framing pieces alone or choose a comfortable clip.
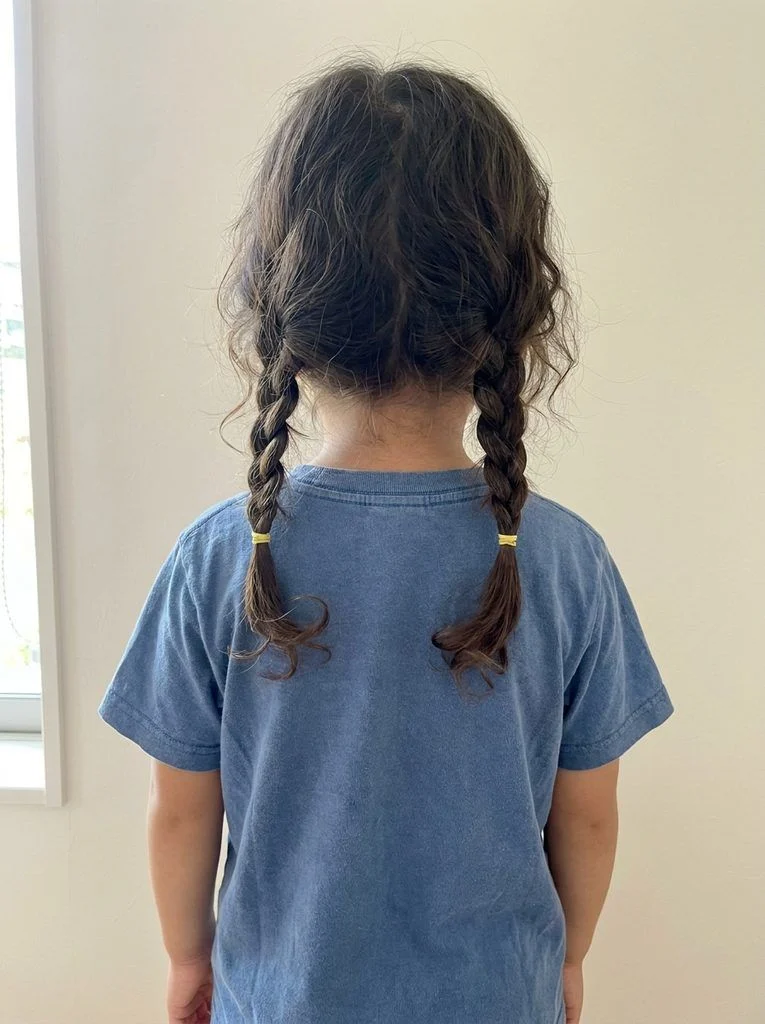
11. Two Basic Braids
Estimated time: 4–5 minutes with practice
Best for: Medium-length hair that is already detangled
You need: Two small hair ties
Two simple braids are a manageable alternative to braiding along the scalp. The five-minute estimate works best when you already know the technique and the hair is not extremely long.
How to do it:
- Divide the hair into left and right halves.
- Split one half into three strands and make a regular braid starting below the ear.
- Tie the end and repeat on the other side.
Make it easier: Braid only partway down each side if needed. Matching the length of the two finished braids matters more than making the center part exact.
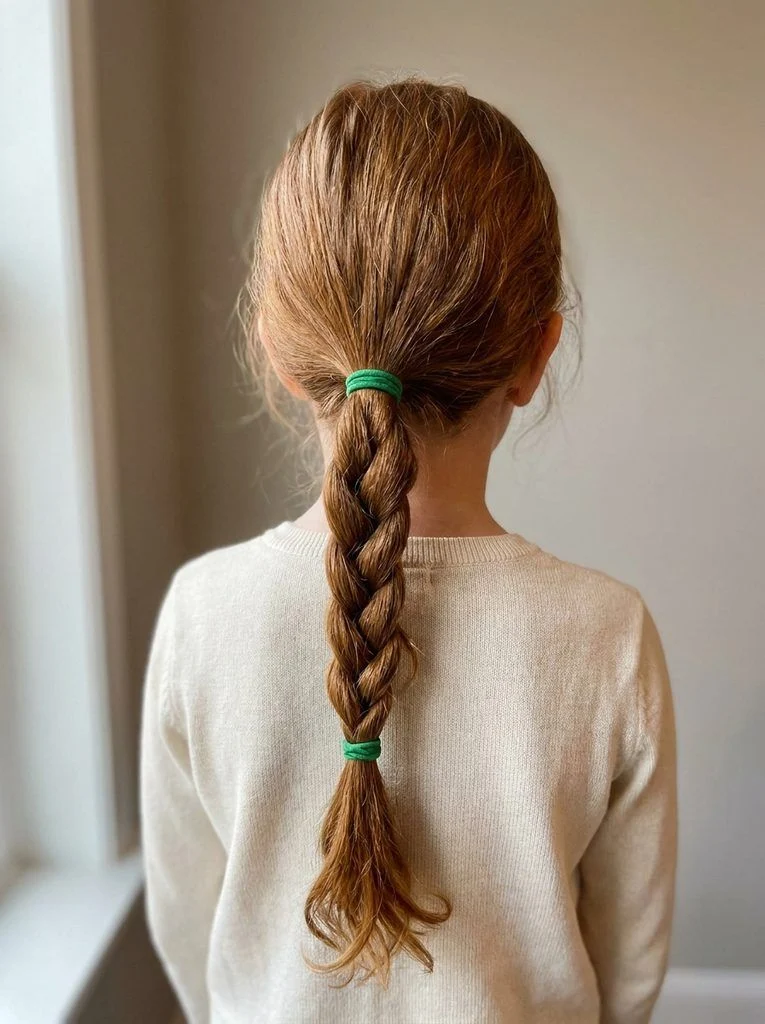
12. Ponytail Braid
Estimated time: 3–5 minutes
Best for: Medium to long hair
You need: Two soft hair ties
Starting with a ponytail gives the braid a fixed base. This can be easier to manage than holding all the hair together while beginning a free-hanging braid.
How to do it:
- Secure a ponytail at a comfortable mid-height position.
- Divide the tail into three sections.
- Make a regular braid and fasten the bottom with the second tie.
Make it easier: Use a low ponytail if holding your arms up gets tiring. The braiding method stays the same.
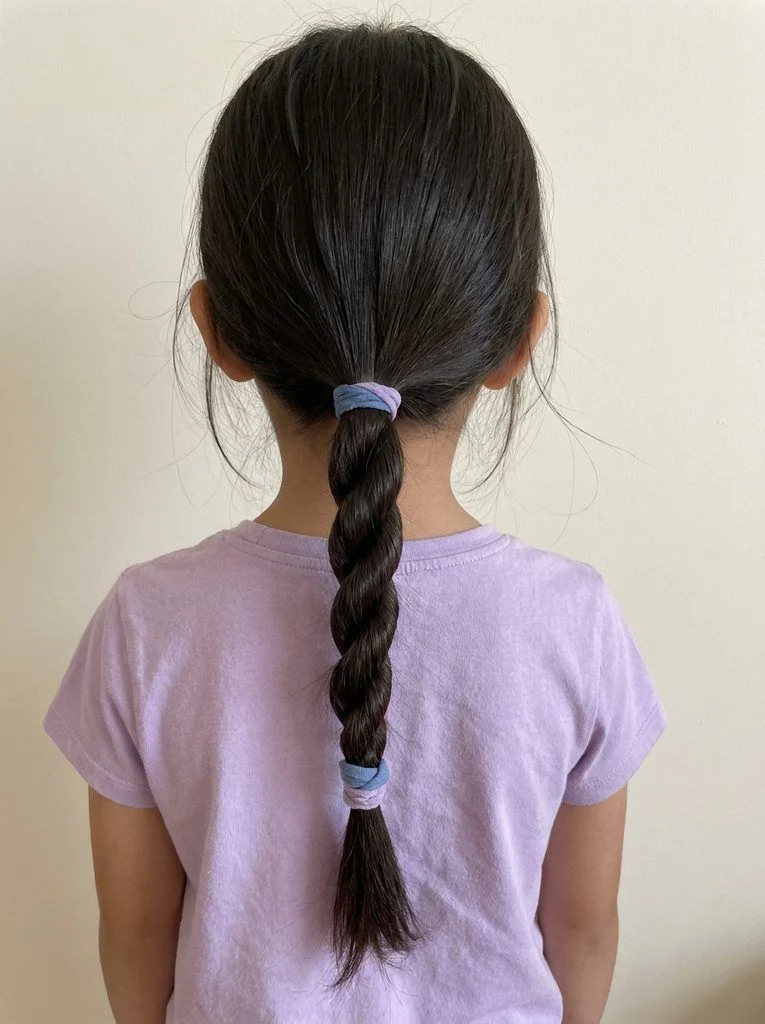
13. Two-Strand Rope Ponytail
Estimated time: 3–4 minutes
Best for: Medium to long hair
You need: Two hair ties
This uses two strands rather than three. The key is twisting the individual sections in one direction and wrapping them together in the opposite direction.
How to do it:
- Make a ponytail and divide the tail into two equal sections.
- Twist both sections separately clockwise.
- Wrap the two sections around each other counterclockwise, keeping their individual twists, and secure the end.
Make it easier: If the rope unravels, check the directions before tightening anything. Practice on the lower half of a ponytail first.
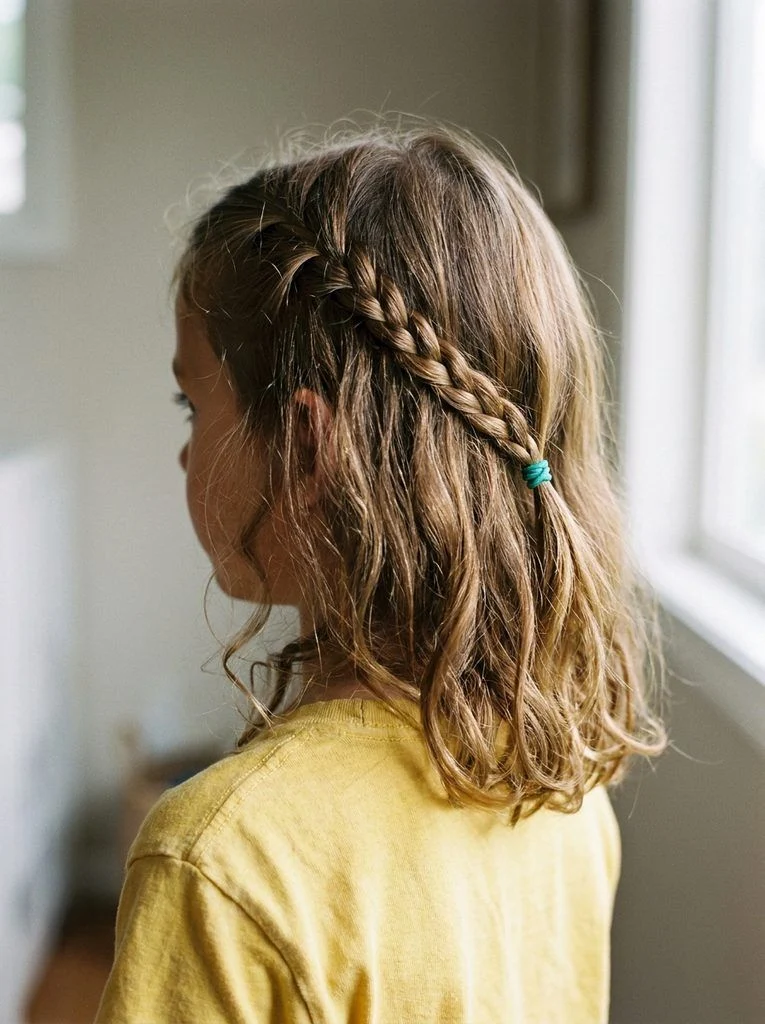
14. Single Front Accent Braid
Estimated time: 2–3 minutes
Best for: Medium to long hair with a front section long enough to braid
You need: One small hair tie
A single small braid adds detail while leaving most of the hair loose. It is especially useful when your child wants to practice braiding without working through a full head of hair.
How to do it:
- Choose a small section near one temple.
- Divide it into three strands and braid toward the ends.
- Secure it and let it rest naturally beside the loose hair.
Make it easier: Use a slightly wider section rather than a tiny, fiddly braid. This is a decorative option; it does not gather all the hair away from the face.
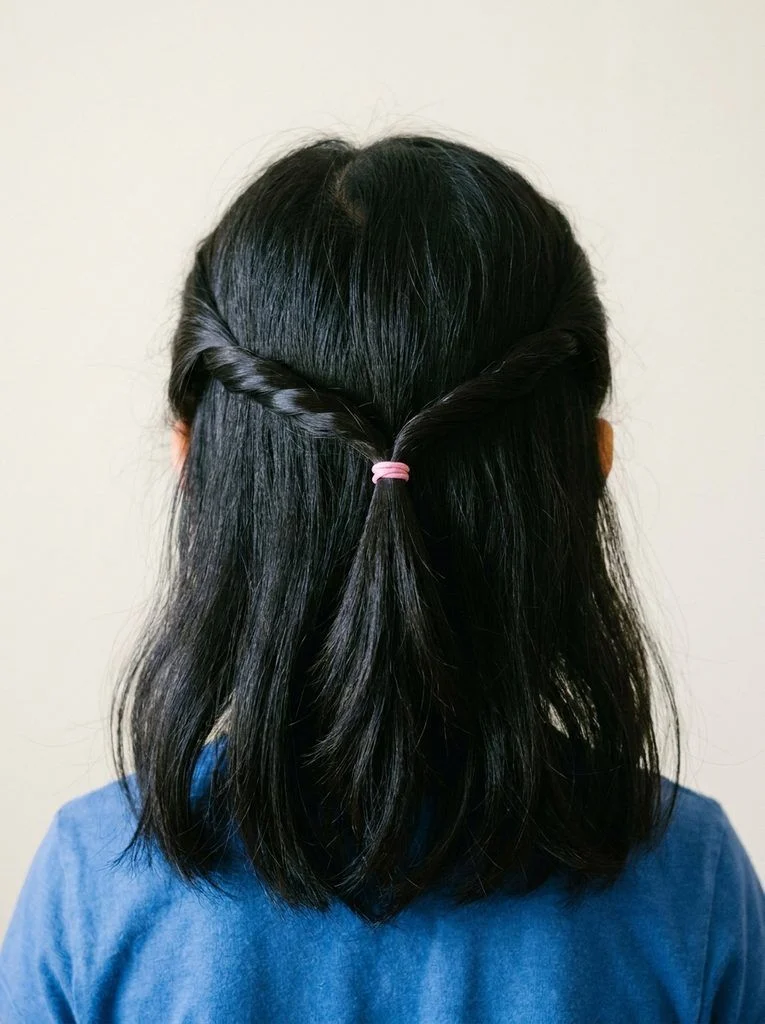
15. Two Side Twists Joined at the Back
Estimated time: 2–3 minutes
Best for: Medium to long hair
You need: One small hair tie
This half-up arrangement pulls back the front sections while leaving the lower length loose. The twists can be soft and slightly uneven; they don’t need a sculpted finish.
How to do it:
- Take one section near each temple.
- Turn each section inward a few times, guiding it toward the back.
- Join the sections with a tie where they meet comfortably.
Make it easier: Hold the first twist with a temporary sectioning clip while making the second, then remove the clip after joining them.
16. Single Side Twist with a Clip
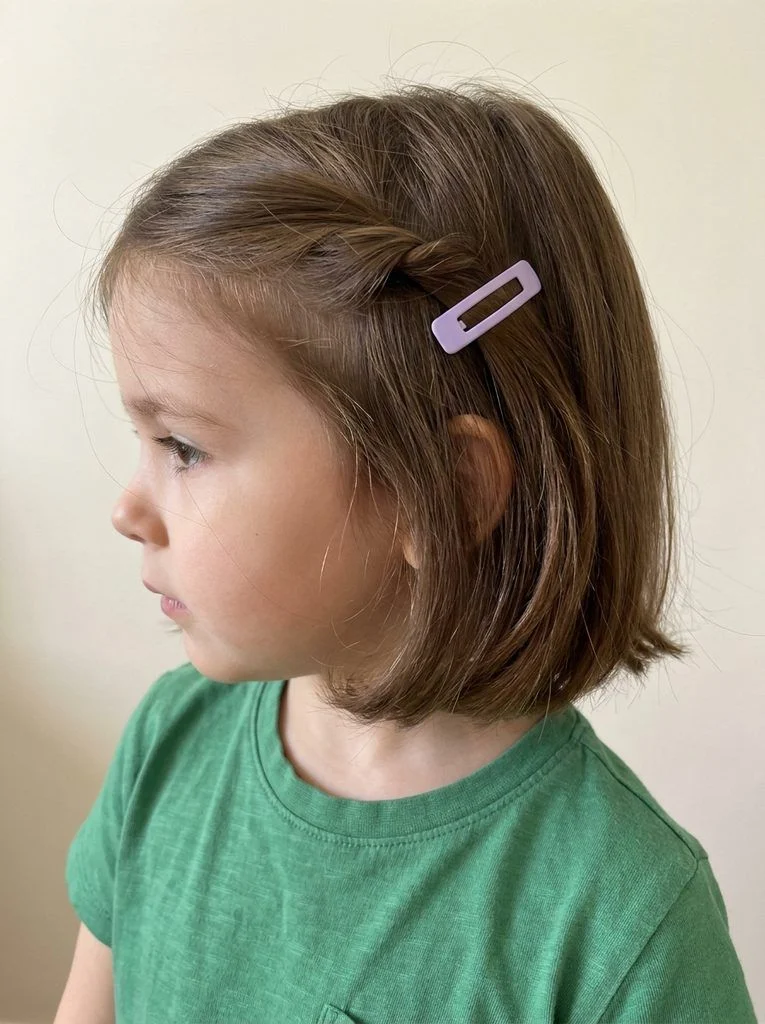
Estimated time: 1–2 minutes
Best for: A bob, growing-out fringe, or longer front layers
You need: One comfortable hair clip
When only one section keeps falling forward, styling the whole head may be unnecessary. A small side twist gives that section somewhere to sit.
How to do it:
- Follow a natural side part.
- Pick up the front section on the fuller side and gently twist it backward.
- Clip the twist above or just behind the ear, catching some underlying hair for support.
Make it easier: Take a smaller section if the clip won’t close easily. Do not force a clip around more hair than it can hold.
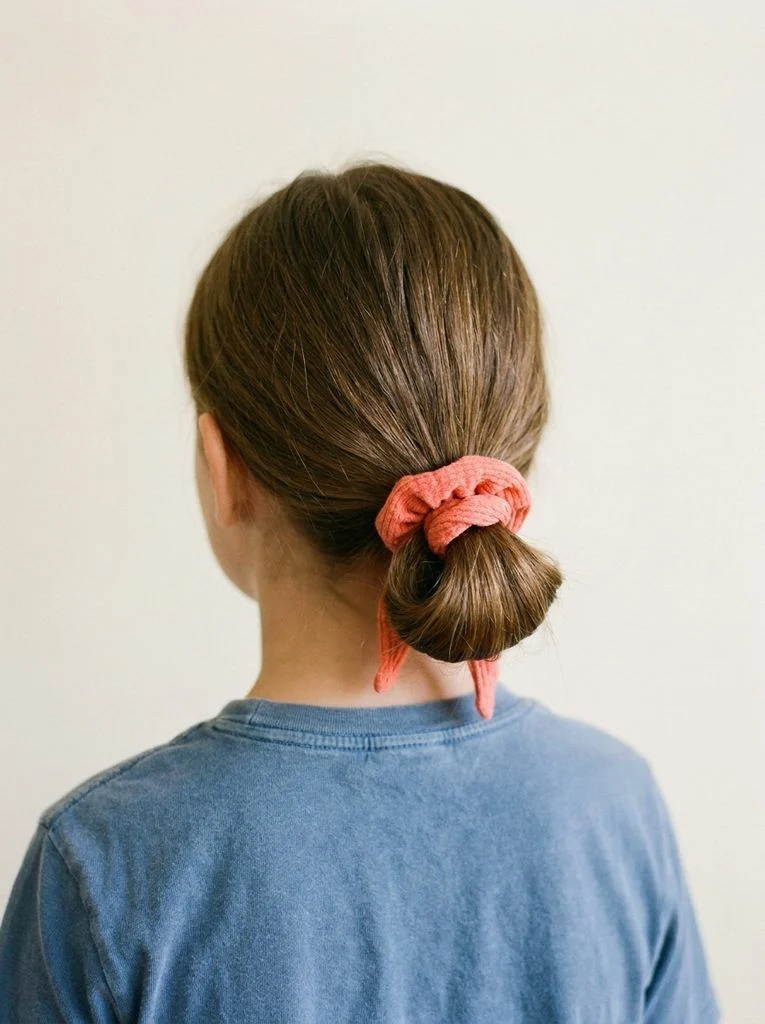
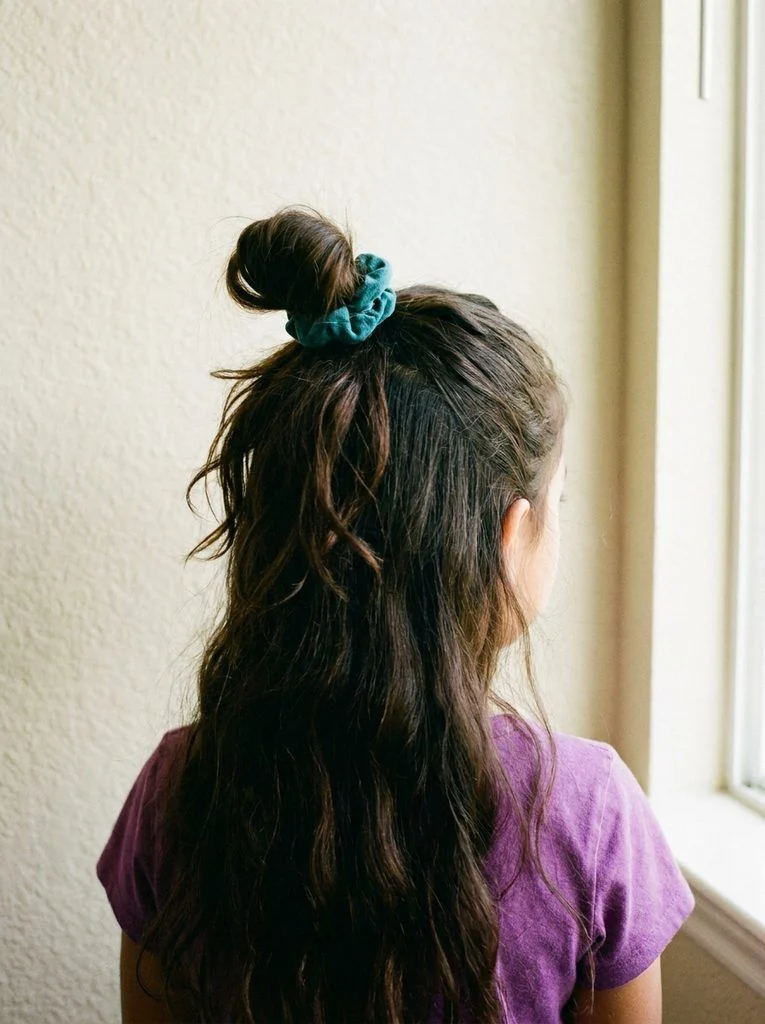
17. Quick Low Loop Bun
Estimated time: 2 minutes
Best for: Medium to long hair
You need: One soft scrunchie
A loop bun is made by leaving part of a ponytail folded inside its tie. It keeps the routine short because there is no separate wrapping or pinning step.
How to do it:
- Gather the hair into a low ponytail position.
- Wrap a scrunchie around it as needed to hold comfortably.
- On the final pass, pull the hair only partway through, leaving a loop and loose ends.
Make it easier: Keep the loop small if the hair is heavy. The ends can remain visible; they are part of the relaxed finish.
18. Relaxed Top Loop Bun
Estimated time: 2–3 minutes
Best for: Medium to long hair that reaches the crown easily
You need: One soft scrunchie
This higher version keeps most of the loose length up. It works best when the hair can gather at the crown without short nape sections being pulled tightly.
How to do it:
- Gather the hair into a comfortable high ponytail position.
- Secure with a scrunchie, stopping halfway through the final pull to form a loop.
- Gently widen the loop and let the ends fall naturally.
Make it easier: Lower the bun if it feels heavy or unstable. You don’t need to add several clips to force it to stay high.
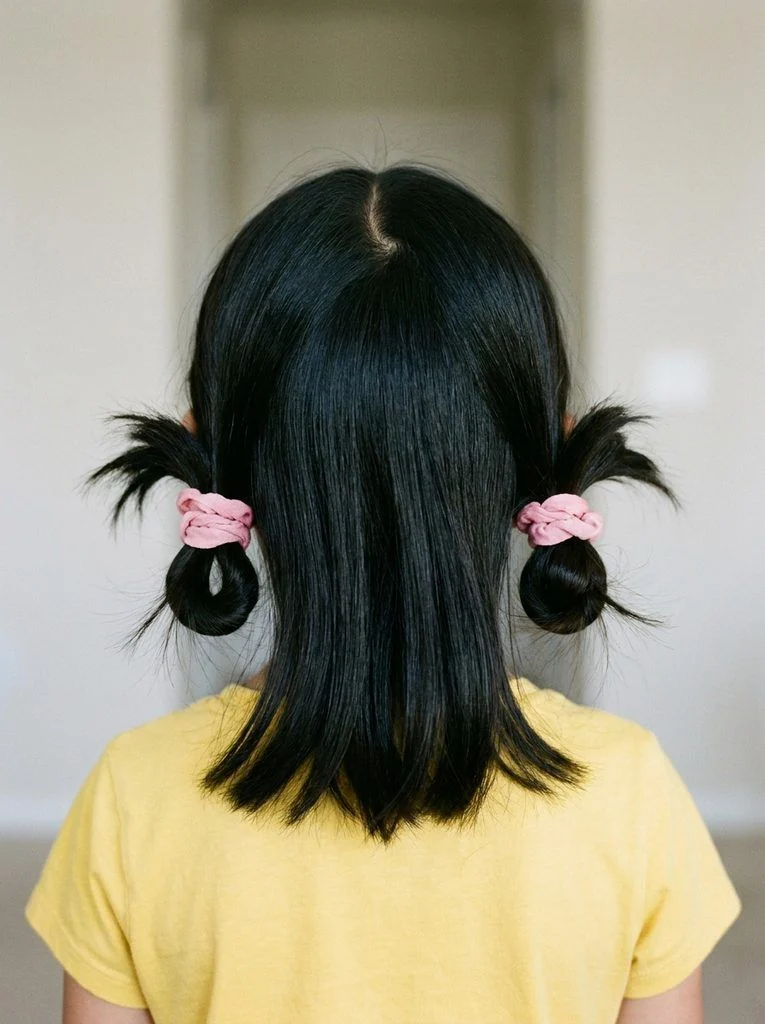
19. Two Low Loop Buns
Estimated time: 3–4 minutes
Best for: Medium-length hair
You need: Two soft hair ties or small scrunchies
Two low buns turn familiar pigtails into a compact style. They are easiest when made as simple loops rather than tightly wrapped coils.
How to do it:
- Divide the hair into two sections.
- Gather one side low behind the ear and secure it, leaving the last pull halfway through the tie.
- Repeat on the other side and gently adjust the two loops.
Make it easier: Let the ends stick out rather than spending extra time hiding them. A little difference in the bun sizes is fine.
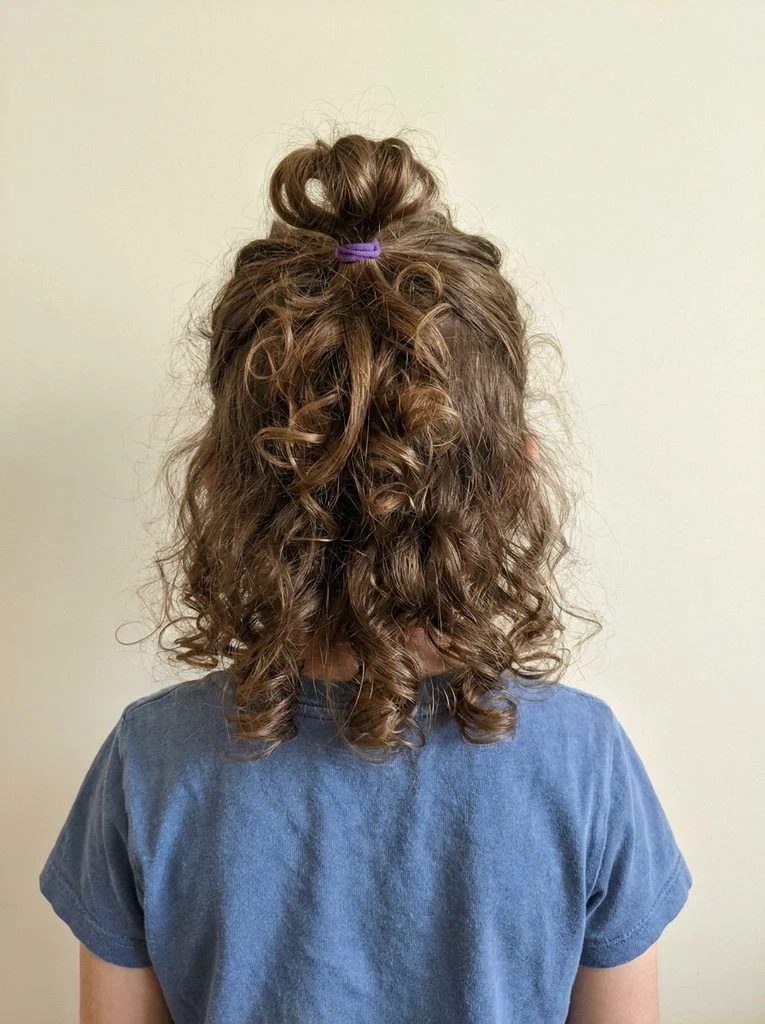
20. Half-Up Loop Bun
Estimated time: 2–3 minutes
Best for: Medium to long hair
You need: One small soft hair tie
A half-up bun gathers the upper portion while showing the hair’s natural length and texture below. It is an easy change from a regular half-up ponytail.
How to do it:
- Gather a modest section from the temples and upper crown.
- Begin securing it as a small ponytail.
- Leave the last pull halfway through the tie to form a loop, with the lower hair loose.
Make it easier: Start with a small section so the bun stays light. For thick hair, there is no need to gather the entire upper half.
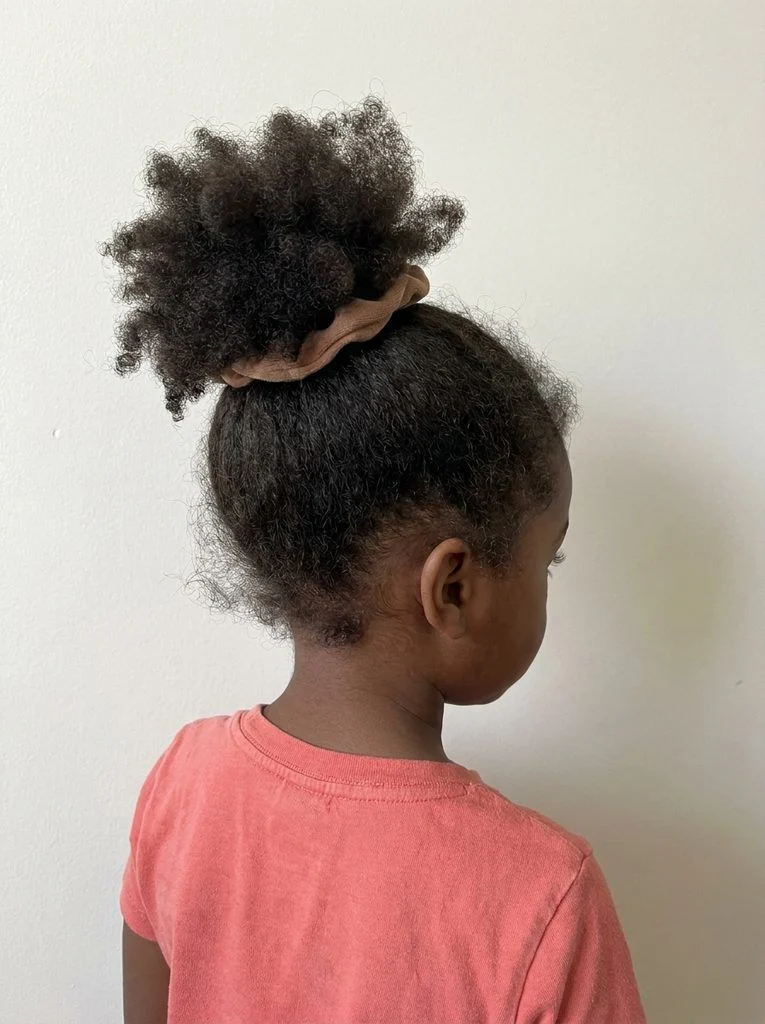
21. Loose High Puff
Estimated time: 2–4 minutes on prepared hair
Best for: Curly or coily hair with enough length to gather upward
You need: A soft, appropriately sized fabric hair tie
A puff lets natural texture be the focus. This timing assumes the hair is already detangled and the curls or coils are ready to arrange; it does not include a full refresh.
How to do it:
- Use your hands to guide the hair upward toward a comfortable gathering point.
- Secure the base loosely with a soft tie that fits the volume.
- Gently arrange the puff with your fingers, keeping its natural shape.
Make it easier: Skip a slick finish and leave the edges natural. If the tie needs force to fit, use a larger one or choose a lower style.
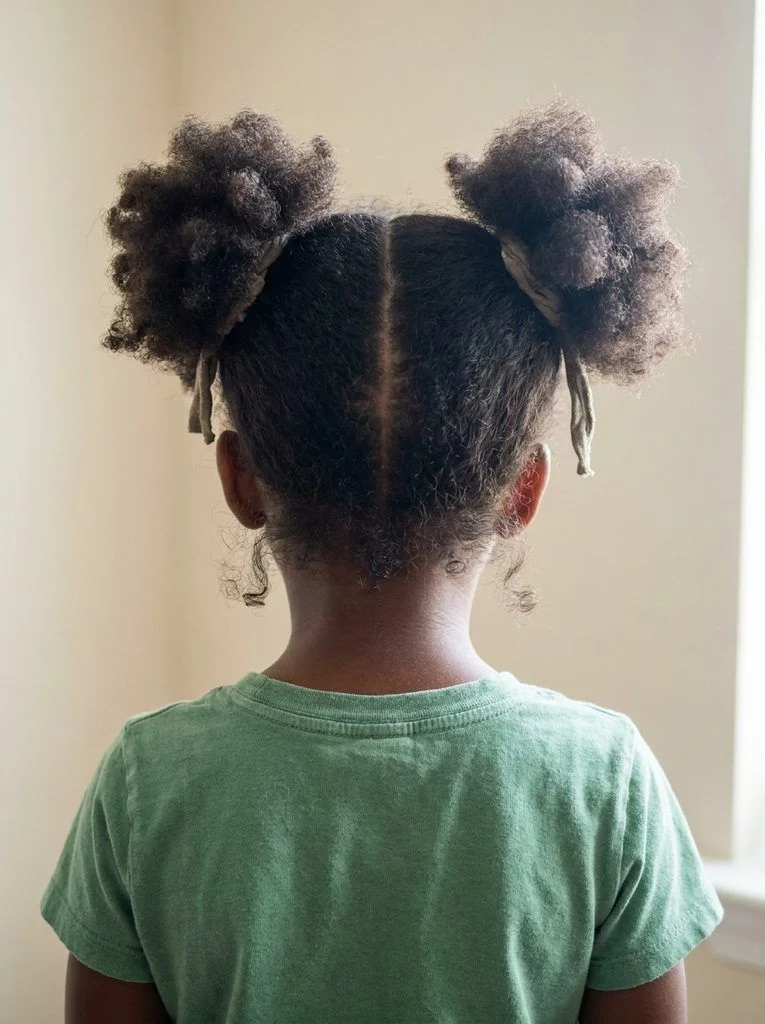
22. Two Soft Puffs
Estimated time: 3–5 minutes on prepared hair
Best for: Curly or coily hair
You need: Two soft fabric hair ties
Two puffs offer separate gathering points when bringing everything into one puff feels awkward. Let each side keep its natural fullness instead of aiming for perfectly matching circles.
How to do it:
- Gently separate the prepared hair into left and right sections.
- Gather each side at a comfortable height and secure loosely.
- Use your fingers to arrange the ends into two soft puffs.
Make it easier: Follow an existing part when possible. Making a new precise part through dense hair can take more time than arranging the puffs themselves.
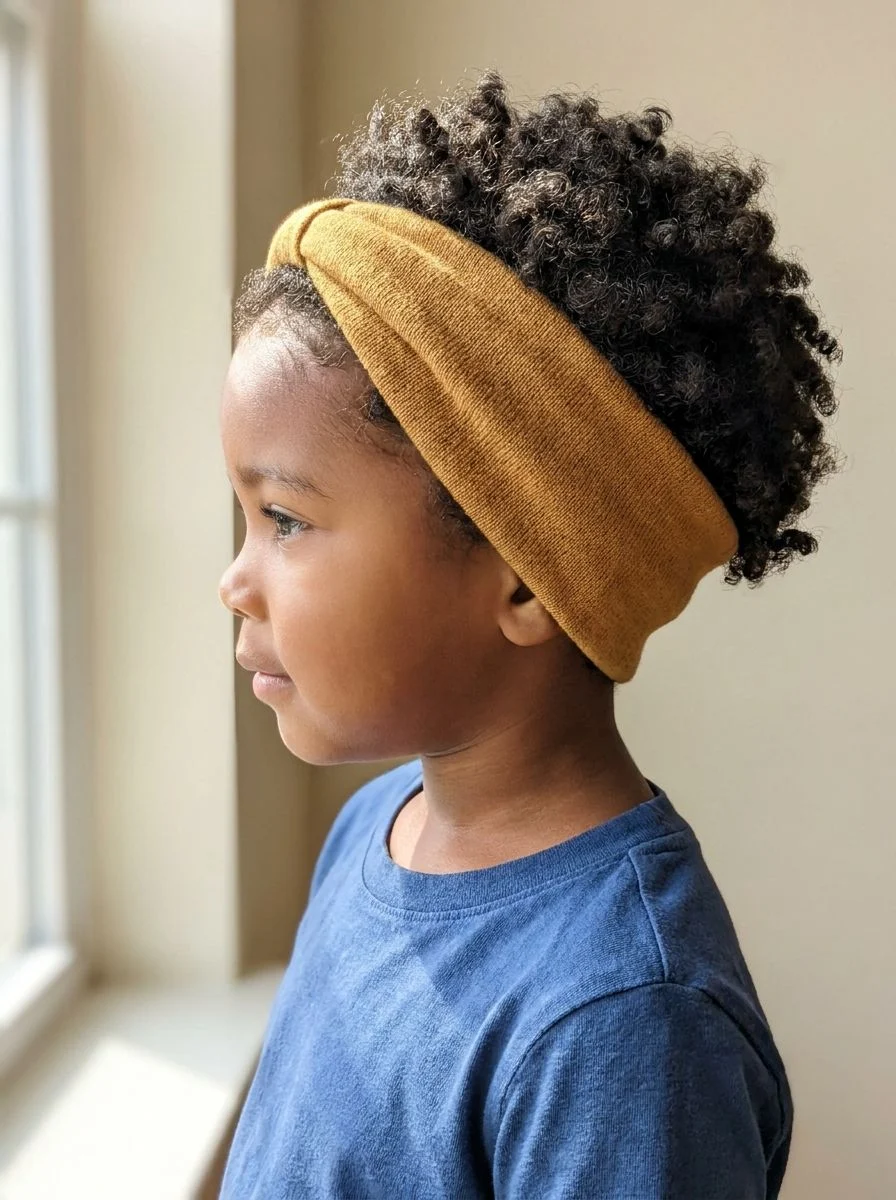
23. Soft Headband with Loose Hair
Estimated time: 1 minute
Best for: Short, medium, or long hair in its natural texture
You need: One comfortable fabric headband
A headband is a useful option when your child prefers loose hair and doesn’t want a ponytail. Choose one that stays in place without squeezing behind the ears.
How to do it:
- Arrange the hair in its usual shape.
- Position the headband a short distance behind the front hairline.
- Free any trapped strands and check how it feels around the ears.
Make it easier: If the band keeps sliding or feels uncomfortable, switch to a simple side clip rather than repeatedly pushing it backward.
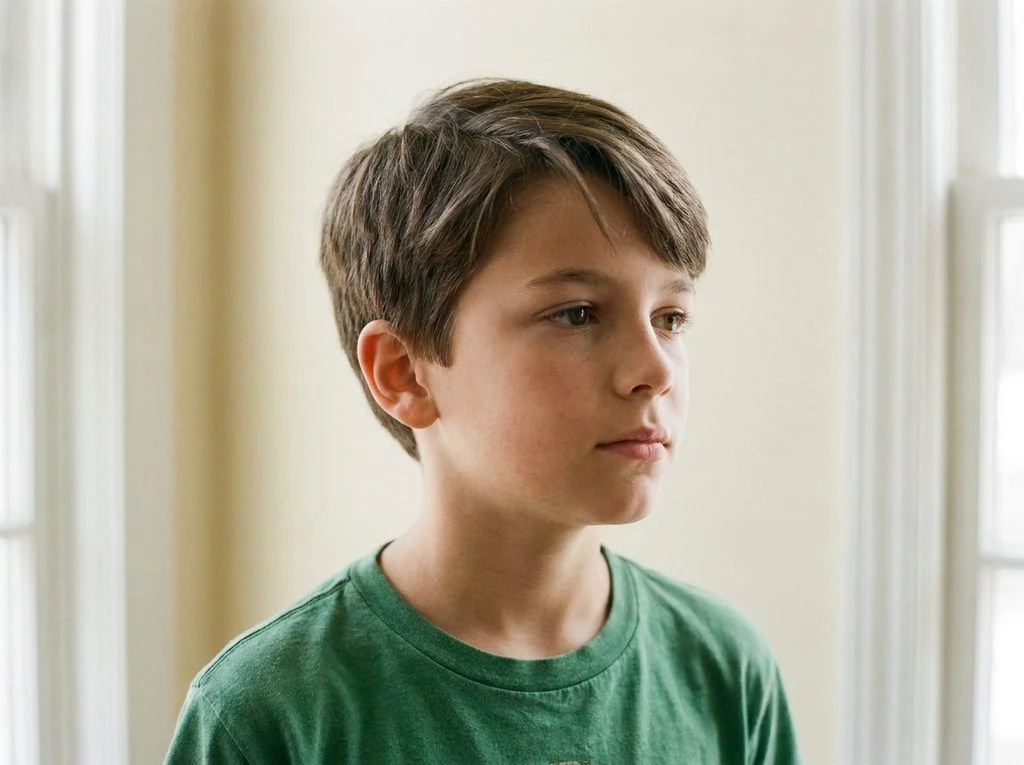
24. Simple Short-Hair Side Part
Estimated time: 1–2 minutes
Best for: Short straight or wavy hair with some length on top
You need: A comb and, if needed, slightly damp hands
Short hair can look ready for the day with a small adjustment to its natural direction. This is an easy option for boys or any child who wears a short cut.
How to do it:
- Find the side where the hair separates most easily.
- Use a comb to guide the longer top section across to the other side.
- Settle any lifted pieces with slightly damp hands and leave the finish soft.
Make it easier: Work with a cowlick rather than forcing a part through it. Hair does not need a sharp line or a stiff finish to look tidy.
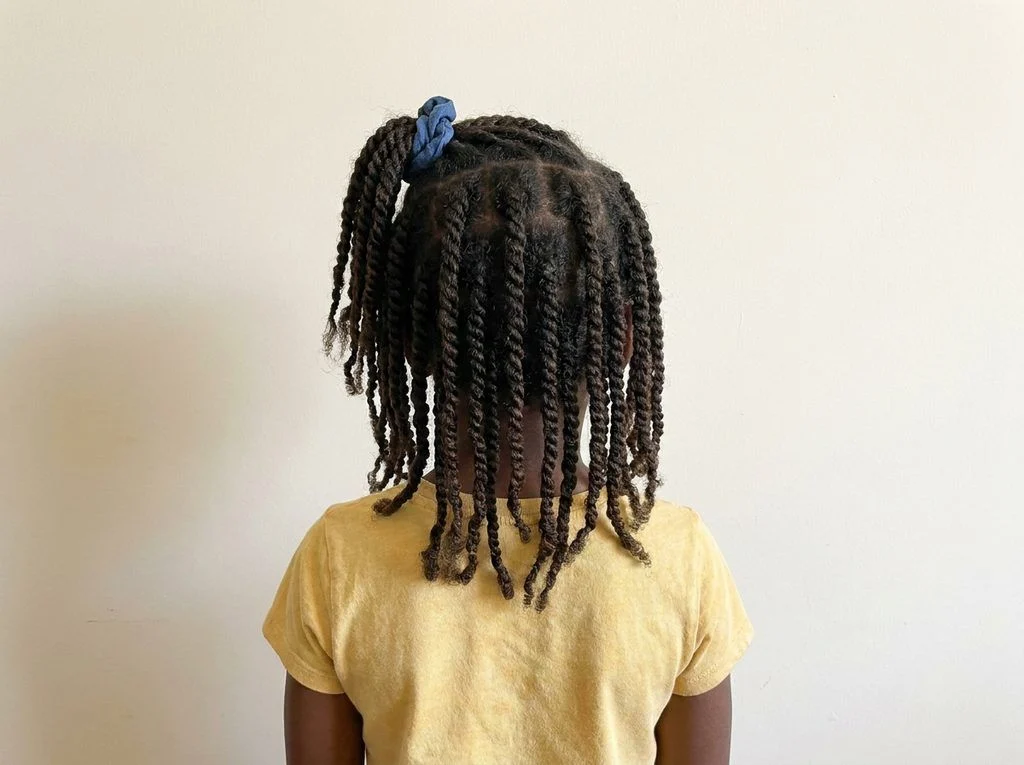
25. Half-Up Style for Existing Twists or Braids
Estimated time: 2–3 minutes to arrange an existing style
Best for: Already completed twists or braids long enough to gather
You need: One soft fabric hair tie
If your child already wears twists or braids, you can change their arrangement without starting over. Only the half-up styling is included in this time estimate; installing the twists or braids takes much longer.
How to do it:
- Select a few twists or braids from each side near the front.
- Guide them toward the back without stretching their roots.
- Secure them loosely together, leaving the rest hanging down.
Make it easier: Use a smaller upper section if the gathered hair feels heavy. Leave out any twist or braid that does not reach comfortably.
How to Choose a Hairstyle for a Busy Morning
Start with what your child’s hair is already doing. If the curls look good loose, a headband may be enough. If long hair is ready to gather, choose a ponytail or braid. If the front pieces are the only problem, use a small twist or half-up style.
Offer two choices rather than the entire list: “Low ponytail or two pigtails?” A limited choice gives your child a say without turning the morning into a long discussion.
Think about the day, too. A hairstyle that looks lovely for a photo may need adjusting for a hat, helmet, or afternoon activity. Try the required headwear over the finished style, and change the hairstyle if it gets in the way of the fit.
A Simple Five-Day School Hair Plan
Use this as a starting point and repeat whichever styles suit your child:
| Day | Medium or long hair | Short, curly, or coily hair alternative |
|---|---|---|
| Monday | Low ponytail | Short-hair side part |
| Tuesday | Half-up ponytail | Soft headband |
| Wednesday | Three-strand braid | Loose high puff on prepared hair |
| Thursday | Low loop bun | Two soft puffs on prepared hair |
| Friday | Bubble ponytail | Half-up arrangement of existing twists |
There is no need to use a different hairstyle every day. Repeating one your child likes can make mornings more predictable.
Common Questions About Easy Kids Hairstyles
What is the easiest hairstyle for a beginner?
A low ponytail, half-up ponytail, or short-hair side part is a good starting point. Each uses only a few steps and does not require braiding. Once gathering and securing the hair feels easy, try a bubble ponytail or a simple braid.
Can all these hairstyles really take five minutes or less?
They can fit into that window when the hair is prepared, the style suits its length and texture, and you are familiar with the steps. The estimates are not timed guarantees. Detangling, drying, long hair, or a child needing breaks can extend the routine.
Which styles work for short hair?
Try a side part, a soft headband, or a clipped side twist. If the front sections reach backward, a small half-up ponytail may also work. Very short hair may only need finger arranging in its natural direction.
Do you need gel or heat tools?
None of these styles requires heated tools. Many can be made with soft ties or clips alone. If a product is already part of your child’s usual routine, follow its directions; adding a new product is not necessary simply to try the styles here.
What if my child dislikes having their hair done?
Keep the session short, offer one or two choices, and ask what feels uncomfortable. Choose a style with fewer sections and accessories. Pause when needed, and let a comfortable, simple result be enough.
How can older kids practice doing their own hair?
Begin with a side ponytail or side braid they can see in a mirror. Let them practice when there is no school-morning deadline. Keep a few soft ties within reach and focus on learning one step at a time.
Find Your Child’s Everyday Favorite
You don’t need to master all 25 hairstyles. Choose a quick everyday option, a style for gathering more of the hair, and one your child enjoys for a change. With a few familiar techniques and supplies close by, getting ready can feel a little less rushed.
