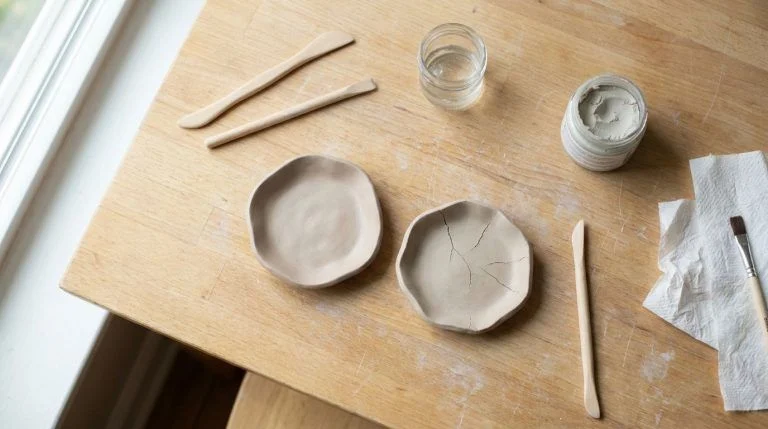
15 Air Dry Clay Projects for Kids
Air dry clay projects for kids make it possible to sculpt keepsakes, ornaments, dishes, figures, and textured art without a kiln. The best results come from simple shapes, even thickness, careful joins, and enough drying time before painting.
This guide turns 15 air dry clay projects for kids into complete activities with materials, suggested ages, active time, planning dry time, steps, and a project-specific safety note. For ideas using other modeling materials too, visit our clay crafts for kids guide.
Safety and Setup for Air Dry Clay Projects for Kids
Choose clay, paint, glue, and sealer whose labels match the child’s age and intended use. The Art and Creative Materials Institute explains its AP and CL certification seals and provides a certified-product search. “Non-toxic” does not mean edible: keep clay and tools out of mouths, cover the work surface, wash hands afterward, and keep food away from the craft table.
- Use blunt child-sized tools; an adult should handle sharp cutting, drilling, strong adhesives, and hanging hardware.
- Avoid powdered clay and do not let children sand dried pieces. Smooth rough edges while the clay is still damp to avoid creating dust.
- Keep beads, buttons, dried beans, small sculptures, magnets, and broken clay away from children under 3 and from pets.
- Ordinary craft air-dry clay is for decoration, not food, drinks, candles, open flame, aquariums, or objects that must be washable or waterproof.
- Air-dry at room temperature unless the exact product label says otherwise; do not put craft clay in an oven, microwave, or kiln.
Drying windows below are planning estimates, not guarantees. One widely used brand notes that its clay is generally dry to the touch in about 24 hours and fully dry in about 72 hours, while environmental conditions can change the timing; its manufacturer FAQ also warns against ovens, microwaves, kilns, open flame, and high heat. Always follow the instructions for the clay actually in your hand.
Quick Project Planner
| Project | Suggested age | Active time | Planning dry time |
|---|---|---|---|
| 1. Birds and pinch-pot nests | 5+ with help | 35 minutes | 48–72 hours |
| 2. Nature-print ornaments | 4+ with help | 20 minutes | 24–48 hours |
| 3. Hand-shaped trinket dish | 5+ with adult cutting | 30 minutes | 48–72 hours |
| 4. Coil pot | 6+ | 45 minutes | At least 72 hours |
| 5. Beaded heart ornaments | 6+; small-parts caution | 30 minutes | 48 hours |
| 6. Small-world figures | 6+ | 45–60 minutes | 48–72 hours |
| 7. Lace-textured ornaments | 5+ | 25 minutes | 24–48 hours |
| 8. Coral-reef sculpture | 8+ with guidance | 60 minutes | 72 hours or longer |
| 9. Mosaic art tile | 6+; small-parts caution | 40 minutes | 48–72 hours |
| 10. Painted mosaic pinch pot | 5+ | 30 minutes plus painting | 48–72 hours |
| 11. Fairy house | 7+ with guidance | 60 minutes | 72 hours or longer |
| 12. Nature mobile with clay beads | 8+; adult assembly | 45 minutes plus assembly | 48–72 hours |
| 13. Pinch-pot keepsake | 4+ with help | 25 minutes | 48–72 hours |
| 14. Relief tile | 6+ | 40 minutes | 48–72 hours |
| 15. Coil hearts | 4+ with help | 25 minutes | 24–48 hours |
15 Air Dry Clay Projects for Kids
1. Clay Birds and Pinch-Pot Nests
These birds and nests are welcoming air dry clay projects for kids who are learning to pinch, roll, and join simple forms. Keeping the birds chunky makes them easier to shape and less likely to lose a thin wing or beak.
Suggested age: 5+ with help | Active time: 35 minutes | Planning dry time: 48–72 hours
Materials
- Child-suitable air-dry clay
- Small cup of water and a blunt clay tool
- Washable water-based paint and brushes
- PVA craft glue, optional
Steps
- Roll a ball for the nest. Press a thumb into the center, then pinch and rotate until the wall is about as thick as a pencil.
- For each bird, shape one oval body and add a short pinched beak. Make shallow wing marks with a blunt tool instead of attaching fragile wings.
- Scratch the joining surfaces, add one drop of water, and press firmly if you add a head or other piece. Dry the birds and nest separately, turning them once the bottoms are firm.
- Paint only when fully dry. Set the birds loosely inside the nest or let an adult glue them in place.
Safety and success note: Treat the finished birds as display pieces, not toddler toys; dried clay can chip and create small parts.

2. Nature Prints with Leaves and Flowers
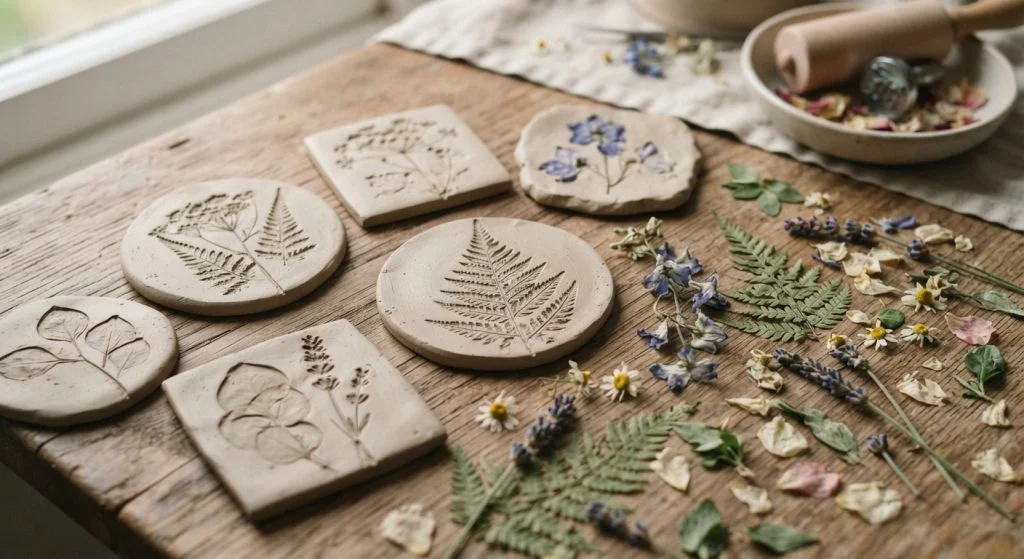
Nature printing is one of the lowest-mess air dry clay projects for kids. Veined leaves, sturdy petals, seed heads, and herbs can leave clear patterns without requiring detailed sculpting.
Suggested age: 4+ with help | Active time: 20 minutes | Planning dry time: 24–48 hours
Materials
- Air-dry clay and a smooth rolling pin or dowel
- Clean, dry leaves or non-irritating flowers
- Round cutter or an upside-down cup
- Paper straw for a hanging hole
- Water-based paint, optional
Steps
- Roll the clay to an even 1/4-inch thickness on a washable mat.
- Lay a leaf or flower face down and roll once with light pressure. Lift it away slowly so the texture remains sharp.
- Cut a circle or free-form shape and make a hanging hole with a paper straw at least 1/2 inch from the edge.
- Dry flat, turning after the top feels firm. Add a thin paint wash to highlight the imprint if desired.
Safety and success note: Use only plants an adult can identify as safe to handle. Avoid thorny, irritating, moldy, or pesticide-treated material.
3. Hand-Shaped Decorative Dish
Keepsake air dry clay projects for kids include this hand-shaped dish, which records a child’s size at one moment in time. It can hold dry trinkets after curing, but it should not be used for food, drinks, soap, or anything wet.
Suggested age: 5+ with adult cutting | Active time: 30 minutes | Planning dry time: 48–72 hours
Materials
- Air-dry clay and rolling pin
- Paper, pencil, and child-safe scissors
- Blunt clay knife used by an adult
- Small bowl covered with reusable wrap or parchment
- Water-based paint and optional craft sealer
Steps
- Trace the child’s hand on paper and cut out the paper template. Roll clay about 1/4 inch thick.
- Place the template on the clay. An adult cuts around it with a blunt clay tool, then everyone smooths the edge with a damp fingertip.
- Curve the clay hand gently over the back of a covered bowl. Do not force the fingers into tight bends, which can crack as they dry.
- Remove the form once the clay is firm enough to hold its curve, then finish drying. Paint and seal only after it is dry all the way through.
Safety and success note: A sealer may improve splash resistance, but it does not turn ordinary craft clay into a food-safe or washable dish.

4. Beginner Coil Pot
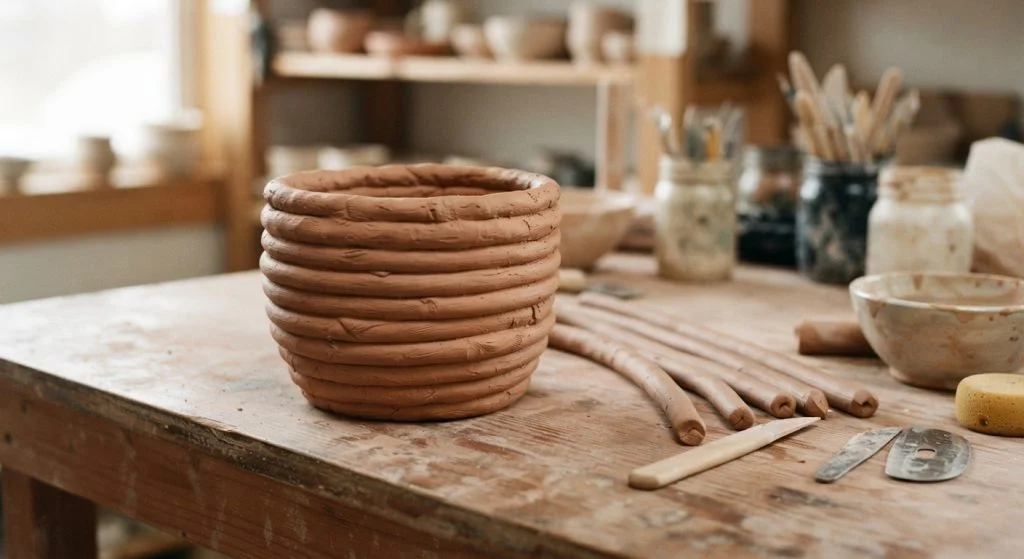
Technique-based air dry clay projects for kids can begin with this coil pot, which introduces hand-building without requiring a wheel. Short, wide pots are more stable than tall ones, and pencil-thick coils are sturdy enough for beginner hands.
Suggested age: 6+ | Active time: 45 minutes | Planning dry time: At least 72 hours
Materials
- Air-dry clay
- Washable mat and smooth board
- Blunt scoring tool and small cup of water
- Water-based paint, optional
Steps
- Flatten a clay ball into a base about 3–4 inches wide and 1/4 inch thick.
- Roll several even coils. Scratch the edge of the base and the first coil, add a tiny amount of water, and press the coil around the base.
- Stack two or three more coils, joining each one the same way. Smooth the inside seams with a finger while leaving the outside coils visible.
- Let the pot dry slowly on a flat board and rotate it when firm. Wait until completely dry before painting.
Safety and success note: Keep the walls under about 4 inches high for a first attempt. This is a decorative container, not a cup or planter for direct watering.
5. Beaded Heart Ornaments
These air dry clay projects for kids combine cookie-cutter shapes with large beads or flat craft gems. Because decorations can loosen as clay shrinks, the ornaments belong on a display rather than in a toy box.
Suggested age: 6+; small-parts caution | Active time: 30 minutes | Planning dry time: 48 hours
Materials
- Air-dry clay, rolling pin, and heart cutter
- Large pony beads or flat craft gems
- Paper straw and ribbon
- PVA craft glue handled with adult help
Steps
- Roll clay 1/4 inch thick and cut out hearts. Smooth rough edges while the clay is damp.
- Press large beads or gems halfway into the surface without pushing through the back. Make a hanging hole with a straw, well away from the edge.
- Dry flat and turn once firm. After drying, test every decoration; an adult should remove and glue back anything loose.
- Thread ribbon through the hole and tie securely before displaying.
Safety and success note: Small beads are choking hazards. Keep materials and finished ornaments away from children under 3 and from pets.

6. Chunky Small-World Figures
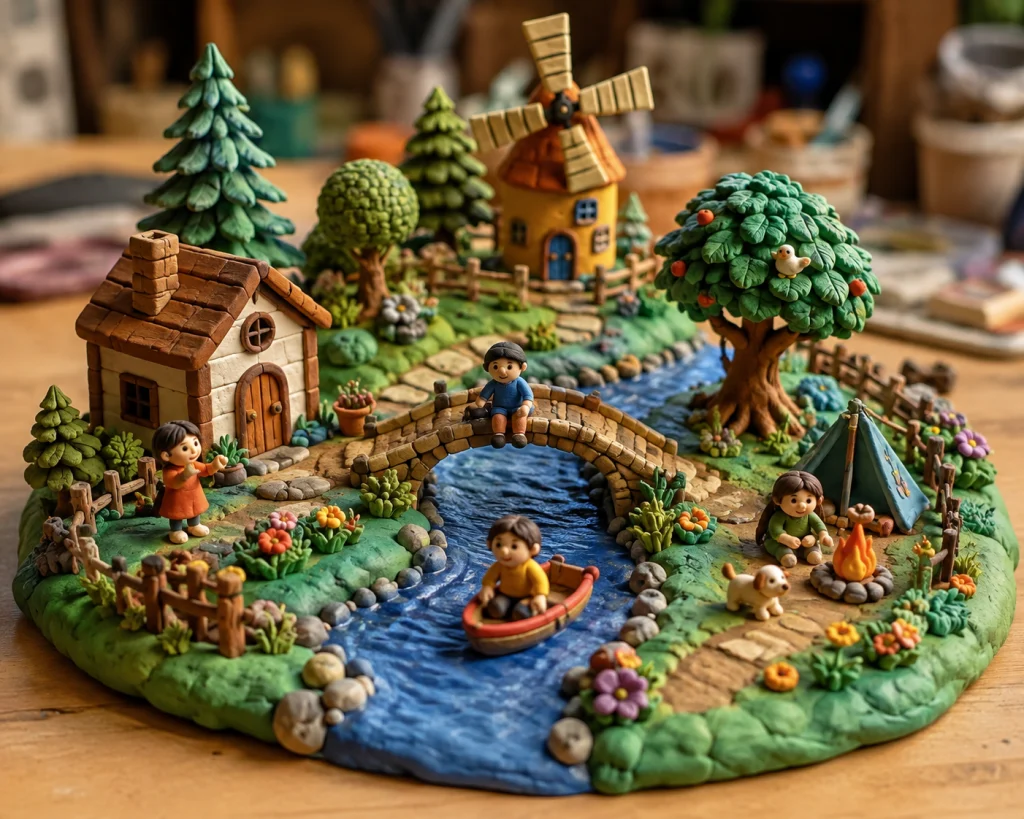
Children can turn current interests into animals, people, trees, food, or fantasy characters for a miniature scene. Design only three or four chunky pieces at first so there is enough time to join each part securely.
Suggested age: 6+ | Active time: 45–60 minutes | Planning dry time: 48–72 hours
Materials
- Air-dry clay in small portions
- Blunt sculpting tool and a little water
- Cardboard base for the scene
- Water-based paint and PVA glue
Steps
- Sketch a simple scene, then choose the few pieces needed to tell its story.
- Build each figure from sturdy ovals, balls, cones, and short cylinders. Avoid toothpicks, wires, or very thin legs.
- Score and dampen every joined surface. Place the pieces on a flat board to dry and turn them carefully when firm.
- Paint the dry figures, then arrange or glue them onto a painted cardboard base.
Safety and success note: Dried air-dry clay is usually too brittle for rough play. Keep small figures away from toddlers and use them for supervised storytelling or display.
7. Lace-Textured Clay Shapes
Lace and washable doilies create detailed texture with one press, making these useful air dry clay projects for kids who want an impressive result without carving every line by hand.
Suggested age: 5+ | Active time: 25 minutes | Planning dry time: 24–48 hours
Materials
- Air-dry clay and rolling pin
- Washable lace scrap or sturdy paper doily
- Large cutters and paper straw
- Water-based paint or paint marker labeled for the child’s age
Steps
- Roll clay to 1/4 inch. Lay the lace flat on top and roll once with gentle, even pressure.
- Peel the lace back slowly. Cut hearts, circles, or simple tags and make a hanging hole if needed.
- Smooth the edges with a damp finger now rather than sanding later. Dry the pieces flat, turning once they are firm.
- Brush a contrasting color lightly across the raised pattern after the shapes are fully dry.
Safety and success note: Use a washable lace scrap rather than a delicate family keepsake; clay can stain or stretch fabric.

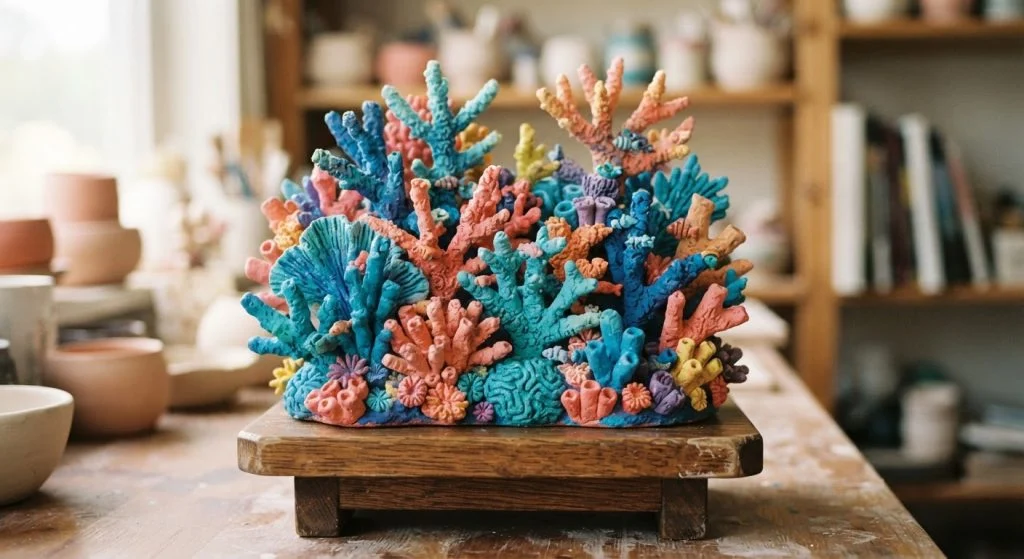
8. Colorful Clay Coral Reef
More detailed air dry clay projects for kids include this reef scene for children ready to combine several sculpting techniques. A thick base, low coral forms, and separate drying for fragile pieces reduce cracks and breakage.
Suggested age: 8+ with guidance | Active time: 60 minutes | Planning dry time: 72 hours or longer
Materials
- Air-dry clay and a small piece of sturdy cardboard for a template
- Blunt tool, paper straw, and small cup of water
- Crumpled paper for temporary outside support
- Water-based paints and PVA glue
Steps
- Make a base tile about 1/2 inch thick with rounded edges. Mark where each coral form will sit.
- Build low tubes, fans, spirals, and textured rocks. Join sturdy forms to the base by scoring and dampening both surfaces.
- Dry delicate branches separately and support leaning forms from the outside with crumpled paper. Never leave paper sealed inside thick clay.
- Allow extra drying time, paint in layers, and let an adult glue on any separately dried pieces.
Safety and success note: Only use glow or specialty paint if its label is suitable for the child’s age and the planned indoor use.
9. Safe Mixed-Material Mosaic Tile
A mosaic can use foam shapes, paper pieces, large buttons, and painted impressions without introducing sharp tile or glass. Planning the design before pressing pieces into clay keeps the surface organized.
Suggested age: 6+; small-parts caution | Active time: 40 minutes | Planning dry time: 48–72 hours
Materials
- Air-dry clay and rolling pin
- Large foam or paper shapes and large buttons
- Blunt tool and PVA craft glue
- Water-based paint, optional
Steps
- Roll a base tile about 1/2 inch thick and round the corners. Arrange mosaic pieces beside it before committing to the pattern.
- Press each piece lightly to make an impression. For a painted mosaic, remove the pieces and deepen the cell lines with a blunt tool.
- Dry the tile flat and turn it when firm. Paint the impressed cells, or let an adult glue the original pieces into their matching places.
- Check every attached piece before display and discard any sharp or damaged material.
Safety and success note: Do not use broken ceramics, mirror, glass, metal scraps, or anything with a sharp edge. Keep buttons and other small parts away from children under 3.

10. Painted Mosaic Pinch Pot
Painting makes air dry clay projects for kids colorful without adding loose pieces. Here, the mosaic can be as simple as wide stripes and dots or as detailed as a grid of small color blocks.
Suggested age: 5+ | Active time: 30 minutes plus painting | Planning dry time: 48–72 hours
Materials
- Air-dry clay
- Blunt tool and small cup of water
- Pencil, washable water-based paint, and brushes
- Child-suitable craft sealer, optional
Steps
- Roll a ball and press a thumb into the center without going through the bottom.
- Pinch and rotate to create an even bowl. Compress cracks with a damp fingertip and flatten the base gently so it stands.
- Dry completely. Draw a loose mosaic grid in pencil, then fill the sections with paint and let each color dry before adding another.
- An adult may add a label-approved sealer for a decorative finish after the paint cures.
Safety and success note: Use the pot for dry treasures only. It is not food-safe, watertight, or suitable for a candle.

11. Clay Fairy House with Nature Details
Fairy houses are imaginative air dry clay projects for kids who enjoy building scenes. Making the walls and roof as separate, sturdy forms is more reliable than stretching one thin sheet over a jar.
Suggested age: 7+ with guidance | Active time: 60 minutes | Planning dry time: 72 hours or longer
Materials
- Air-dry clay
- Clean, fully dry twigs, bark pieces, or leaves
- Blunt sculpting tool and small cup of water
- Water-based paint and PVA glue
Steps
- Shape a short, hollow cylinder with walls about 1/4 inch thick. Cut or press in a door and windows without weakening the base.
- Make a separate low cone or domed roof. Add shallow bark, stone, or leaf textures with a blunt tool.
- Dry the house and roof separately on a flat board. Turn them when firm and wait until the thickest area is dry before painting.
- Let an adult glue the roof and a few clean nature details in place. Keep the decoration simple so pieces do not shed.
Safety and success note: This is a display house, not an outdoor shelter or a durable playset. Natural pieces and clay fragments can become choking hazards.

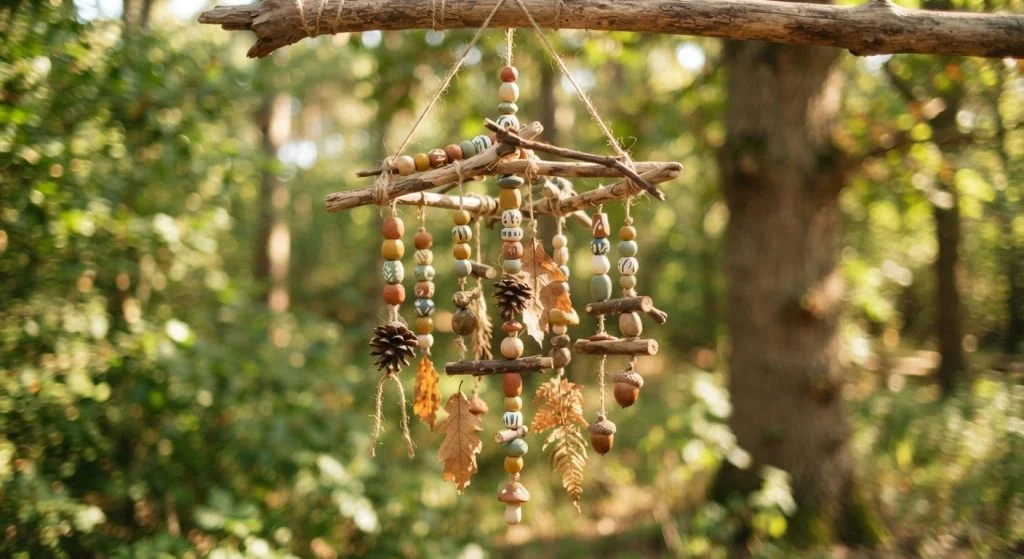
12. Nature Mobile with Large Clay Beads
Large painted beads can connect lightweight leaves, feathers, or seed pods in a wall mobile. Because hanging cords create a strangulation risk, an adult must assemble and position the finished mobile completely out of children’s reach.
Suggested age: 8+; adult assembly | Active time: 45 minutes plus assembly | Planning dry time: 48–72 hours
Materials
- Air-dry clay
- Paper straw or smooth skewer used by an adult
- Water-based paint and brushes
- Light wooden dowel, twine, and clean lightweight nature items
Steps
- Roll beads at least 1 inch wide. An adult makes a generous center hole so the clay will not need drilling after it dries.
- Dry the beads with space around them, rotating them as they firm. Paint only after the centers are fully dry.
- An adult plans short strands, ties the beads and lightweight nature pieces securely, and balances them on a dowel.
- Mount the mobile against a wall where it cannot be pulled, climbed on, or swing into a walkway.
Safety and success note: Never hang a mobile over a crib, bed, changing area, or play space. Check knots and clay pieces periodically and remove the mobile if anything loosens.
13. Personalized Pinch-Pot Keepsake
Beginner air dry clay projects for kids can be as simple as a pinch pot personalized with an initial, date, fingerprint pattern, or favorite color. This version stays intentionally uncomplicated, making it a good first clay project.
Suggested age: 4+ with help | Active time: 25 minutes | Planning dry time: 48–72 hours
Materials
- Air-dry clay
- Blunt tool, letter stamp, or clean pencil end
- Washable water-based paint and brushes
- Small piece of felt for the base, optional
Steps
- Roll a smooth ball, press a thumb into the middle, and pinch around the wall while rotating the clay.
- Flatten the bottom gently, repair damp cracks, and press a date or initial into the outside with a blunt tool.
- Dry on a flat board, rotating when firm. Paint in two thin coats after it dries completely.
- Glue a felt circle under the base if the pot will sit on a shelf or desk.
Safety and success note: Keep the rim and walls thick enough to survive handling. Use it for dry objects only, not food, water, plants, or flame.

14. Colorful Clay Relief Tile
Relief tiles are air dry clay projects for kids who want to combine drawing and sculpture. Raised coils, dots, leaves, and geometric shapes create a tactile design that becomes clearer when painted in contrasting colors.
Suggested age: 6+ | Active time: 40 minutes | Planning dry time: 48–72 hours
Materials
- Air-dry clay and rolling pin
- Cardboard square template
- Blunt scoring tool and a little water
- Water-based paint and brushes
Steps
- Roll a tile about 1/2 inch thick and cut around a cardboard template. Round each corner and smooth the sides while damp.
- Make low coils and flattened shapes for the raised design. Score, dampen, and press each piece onto the base.
- Dry the tile perfectly flat. Turn it only when it is firm enough to lift without bending.
- Paint the background first, then the raised pattern. Use thin coats so texture remains visible.
Safety and success note: Avoid making a hole in a heavy tile. Display it flat or have an adult choose hardware rated for its finished weight.

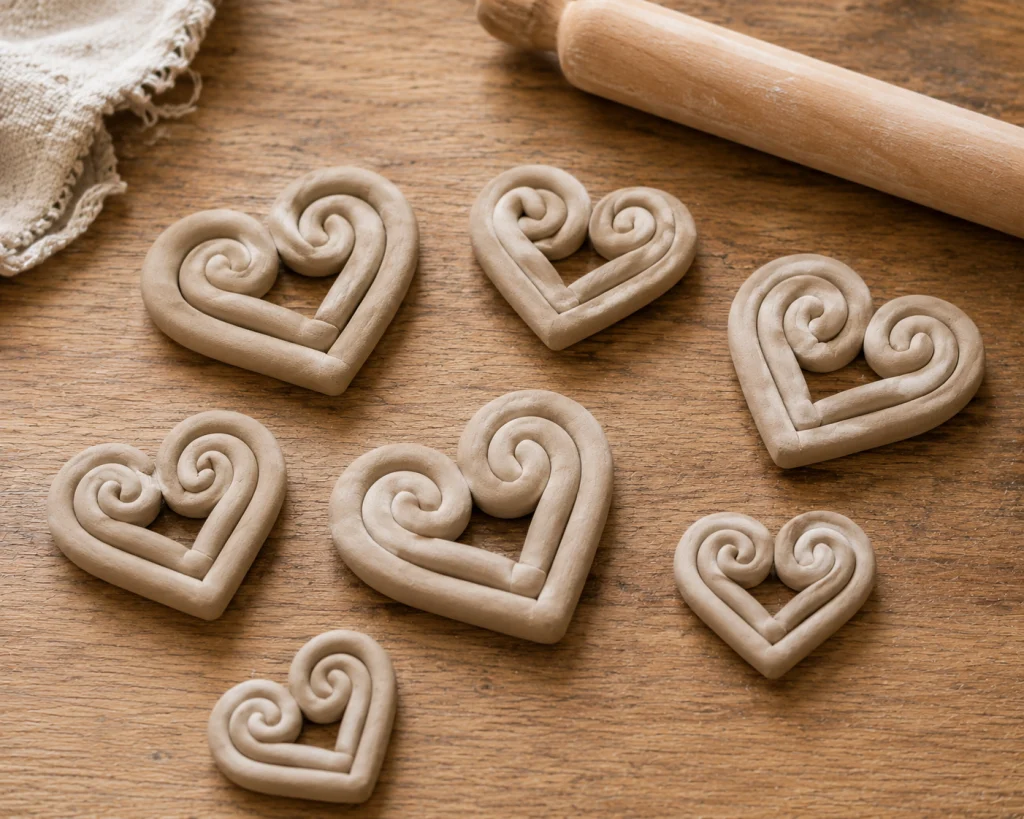
15. Simple Clay Coil Hearts
Coil hearts finish the list with a forgiving shape that children can remake easily. They can become gift tags, flat ornaments, name-place decorations, or simply small painted keepsakes.
Suggested age: 4+ with help | Active time: 25 minutes | Planning dry time: 24–48 hours
Materials
- Air-dry clay
- Washable mat or parchment
- Paper straw for an optional hanging hole
- Water-based paint and ribbon, optional
Steps
- Roll a coil a little thicker than a pencil and bend it into a heart on the work surface.
- Overlap or press the two ends together at the bottom point. Smooth the join with a damp fingertip so the heart remains one piece.
- Make a hanging hole with a straw if desired, keeping it away from the edge. Leave the heart flat while it dries.
- Paint the fully dry heart and let an adult add ribbon for display.
Safety and success note: A flat, chunky heart is stronger than a very thin outline. Display ornaments out of reach if ribbon or a broken piece could become a hazard.
FAQ About Air Dry Clay Projects for Kids
How thick should an air-dry clay project be?
For air dry clay projects for kids, aim for an even thickness of about 1/4 inch for flat ornaments and roughly 1/4–1/2 inch for bases and pot walls. Very thin edges chip easily, while thick solid lumps can remain damp inside and crack. Hollow or divide larger sculptures when possible.
How do you join two pieces of air-dry clay?
Lightly scratch both joining surfaces, add only a tiny amount of water, press them together, and smooth the seam. Too much water makes the surface slippery and weak. Fragile pieces can instead dry separately and be attached by an adult with a suitable craft adhesive.
When is the clay ready to paint?
Wait until the piece is firm, uniformly pale, and no longer cool or damp at its thickest point. Paint can trap moisture inside a partly dried sculpture. The maker’s instructions take priority over a generic timeline.
Why did the clay crack while drying?
Common causes include uneven thickness, too much water, weak joins, rapid heat, or a thick center drying much more slowly than the surface. Use compact shapes, smooth small cracks while damp, dry on a flat surface away from heaters, and rotate when the piece is firm.
If cracking keeps happening, read our complete guide on how to stop air-dry clay from cracking to identify the cause and repair the piece.
Can finished air-dry clay be washed?
Usually no. A label-approved craft sealer can improve resistance to occasional splashes, but it does not make ordinary air-dry clay waterproof, dishwasher-safe, or food-safe. Dust finished pieces with a soft dry cloth instead of soaking them.
Final Thoughts on Air Dry Clay Projects for Kids
The most successful air dry clay projects for kids match the child’s hand skills and patience: start with nature prints, coil hearts, or a pinch pot before moving to a reef, mobile, or fairy house. Keep shapes sturdy, follow the product label, allow extra drying time, and let the child choose the final colors and details. For more hands-on ideas, browse our kids crafts collection or try these summer crafts for kids.