How to Stop Air-Dry Clay From Cracking: Causes and Fixes
Air-dry clay usually cracks because one part of the project shrinks or dries faster than another. Thick centers, thin edges, weak joins, excess water, and forced heat can all make that difference worse. The good news is that most cracks are preventable once you match the fix to the cause.
If you are wondering how to stop air-dry clay from cracking, focus on four things: keep the thickness reasonably even, use very little added water, build secure joins, and let the piece dry slowly according to its product label. This guide shows what to do while shaping, while drying, and after a crack has already appeared.
Why Does Air-Dry Clay Crack?
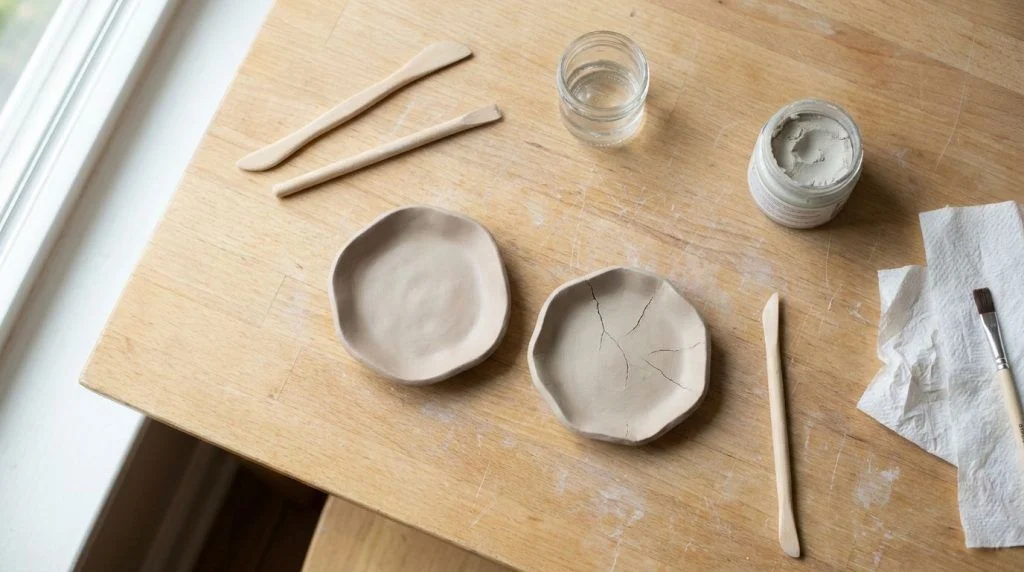
Air-dry clay loses moisture and contracts as it dries. That normal shrinkage becomes a problem when the movement is uneven. For example, the rim of a bowl may become firm while its thick base is still damp. The base continues to shrink, but the drier rim cannot move with it, so tension forms and a crack may open.
This does not always mean the clay is defective. A crack is often a clue about the shape, join, moisture, or drying conditions. Look at where the crack started and when it appeared before choosing a repair.
Quick Crack Diagnosis
| What you see | Likely cause | Best first response |
|---|---|---|
| Fine surface lines while you are still shaping | The exposed surface is starting to dry, or the clay has not been compressed well | Smooth with a fingertip and the smallest possible amount of water, then compress the area gently |
| A crack exactly where two pieces meet | The join was not scored, pressed, or supported well; the pieces may also have different moisture levels | Reopen and rebuild the join if the clay is still workable; score, lightly dampen, press, and blend |
| Cracked or curled slab edges | The edge is thinner and drying faster than the center | Even the thickness, soften sharp edges, and slow the drying process |
| A deep split through a thick base or solid form | The outside dried before the damp center, creating uneven shrinkage | For the next version, hollow the form or reduce the thick section; patch only if the split is stable |
| Warping or dampness underneath | Moisture is trapped against the board or mold | When the piece is firm enough to handle, expose the underside and continue drying evenly |
| A crack that appears after painting | The clay may have been painted before its thickest area was fully dry | Let it finish drying, repair the crack, and touch up the finish afterward |
Before You Begin: Let the Product Label Lead
“Air-dry clay” describes a category, not one identical formula. Paper-based clay, mineral clay, lightweight modeling compounds, and homemade mixtures can behave differently. Drying time, safe thickness, water tolerance, and heat instructions can vary by brand.
Read the label before using an oven, microwave, heater, hair dryer, or food dehydrator. There is no universal heat shortcut. For example, Mont Marte specifically advises users not to bake its air-hardening modeling clay and notes that extra heat can encourage cracking. Treat any manufacturer timing as a guide rather than a guarantee because the size of the piece and the room conditions also matter.
For a child’s project, use age-appropriate material, supervise the activity, keep tools simple, and follow all package warnings. Air-dry clay is a craft material; do not assume a finished piece is food-safe, waterproof, or suitable for holding drinking water just because it has been painted or sealed.
How to Prevent Cracks While Shaping
Start With Workable Clay
Fresh clay should bend and press without crumbling at the edges. Knead only enough to make its texture even. Keep the unused portion in an airtight bag or container while you work so it does not develop a dry skin.
If the clay feels slightly dry, follow the package directions for conditioning it. Add moisture cautiously. Flooding the surface can turn it slippery, weaken details, and create a wetter outer layer that shrinks differently from the center. A damp fingertip or small brush is usually easier to control than pouring or spraying water.
Keep the Thickness Even
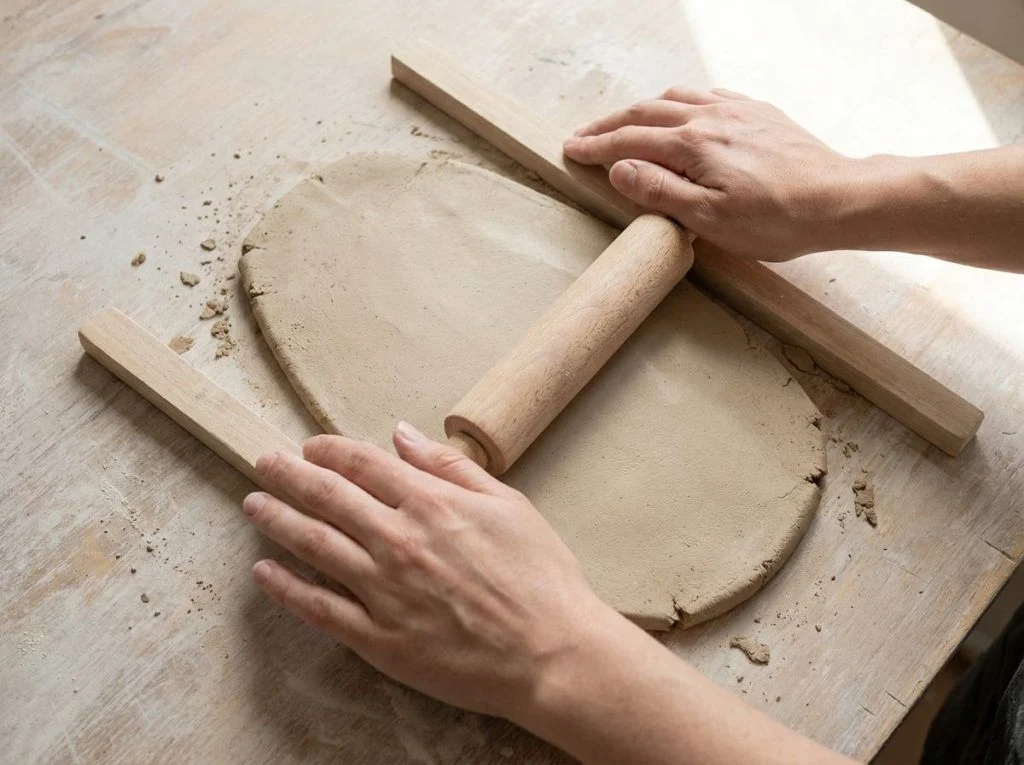
A project does not have to be perfectly measured, but sudden changes from paper-thin to very thick are risky. Roll flat pieces between two simple guide rails if consistent thickness is difficult. Check corners, rims, and the point where a handle or decoration meets the main form.
For a larger figure or container, a compact hollow form often dries more evenly than a heavy solid block. Use an internal support only if the clay manufacturer allows it, and make sure the material is appropriate for the project. Do not seal a wet, non-drying core inside the clay.
Compress and Round Vulnerable Edges
Pressing and smoothing the clay helps close tiny surface gaps before they grow. Pay special attention to cut edges and tight corners. A softly rounded rim is generally less fragile than a feather-thin edge, especially in crafts made by younger children.
Make Strong Joins That Do Not Pull Apart
Handles, ears, arms, petals, and raised decorations commonly crack at their attachment points. Simply pressing one smooth piece onto another may hold while the clay is wet but separate as both pieces shrink.
- Match the moisture. Join pieces while both are similarly workable. A fresh wet piece attached to a partly dry base will shrink at a different rate.
- Score both surfaces. Lightly scratch a small crosshatch pattern where the parts will touch.
- Add minimal moisture. Use a tiny amount of water or the joining method named on the package. Some clays work best with a slip made from that same clay.
- Press and blend. Push the parts together firmly, then smooth clay across the seam without thinning the surrounding area.
- Support the join. Keep a heavy attachment from sagging while it is soft. If possible, design the shape so the attachment rests against the main body instead of projecting far from it.
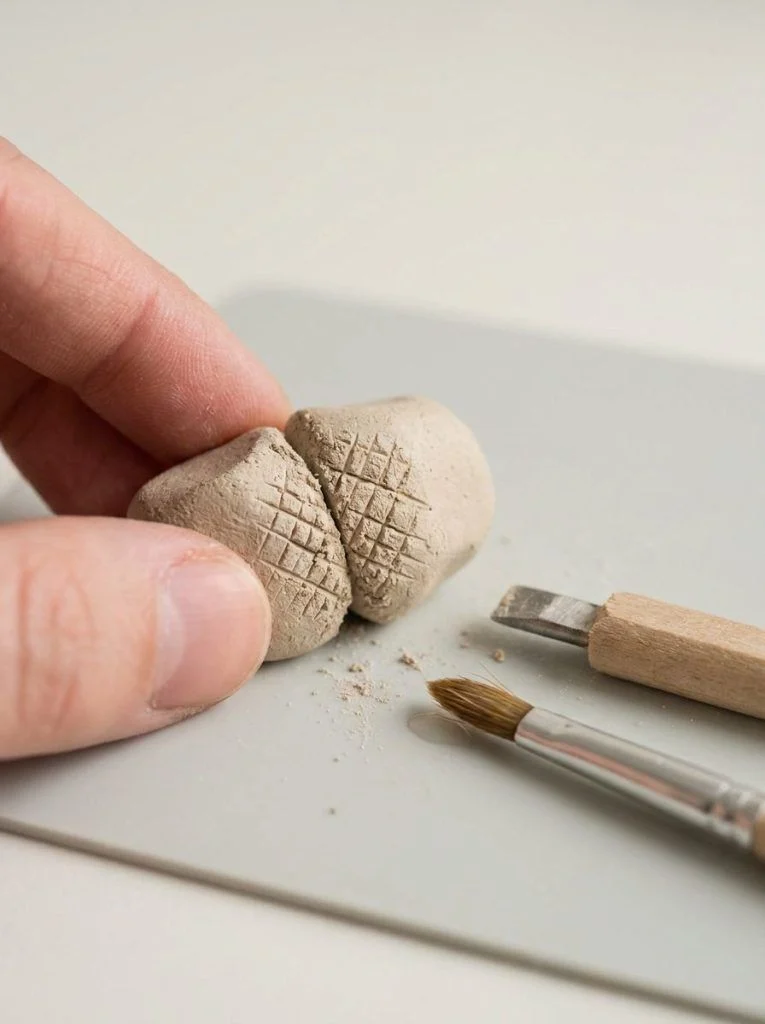
Very thin attachments remain delicate even when joined correctly. For durable children’s keepsakes, choose sturdy shapes and rounded details. You can find suitable forms in these air-dry clay projects for kids and more material options in our guide to clay crafts for kids.
How to Stop Air-Dry Clay From Cracking While Drying
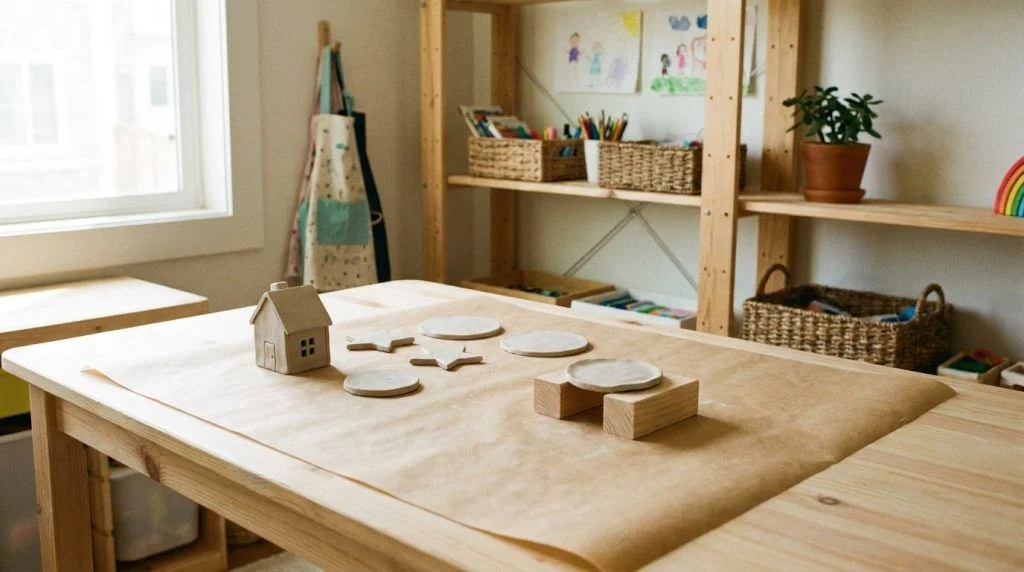
Once shaping is finished, aim for gradual, even drying. Put the project on a clean, flat surface in the room conditions recommended by the manufacturer. Keep it away from radiators, strong direct sun, hot windowsills, and blasts from fans or hair dryers unless the label explicitly says otherwise.
A flat board covered with the surface recommended for your product makes a practical drying station. Leave space around separate pieces. For a slab or a piece with a broad base, wait until it can be moved without bending, then carefully expose the underside so trapped moisture can escape. If a form is drying around a bowl or mold, remove it only when it can hold its shape and the instructions permit removal.
Check progress rather than repeatedly handling soft clay. If the top is becoming pale and firm while the underside remains dark and cool, the piece is not drying evenly yet. Larger or thicker projects need more time than tiny decorations.
How Long Should Air-Dry Clay Dry?
Use the time on your package as the starting point. As one brand-specific example, Crayola says its Air-Dry Clay is generally dry to the touch after 24 hours and fully dry after 72 hours, while also noting that project size and environmental conditions affect the timing. Those numbers should not be applied automatically to a different formula.
Before painting, check the thickest section—not just the surface. The piece should have a uniform dry appearance and should not feel cool or damp in the center or on the underside. When uncertain, extra room-temperature drying time is safer than covering retained moisture with paint.
How to Fix Cracked Air-Dry Clay
The best repair method depends on whether the piece is still workable, partly dry, or completely dry. Repair gently; repeatedly soaking and rubbing the area can enlarge the damage.
If the Clay Is Still Damp
- Support the piece so the crack is not being pulled open.
- Press the two sides toward each other without distorting the shape.
- Compress and smooth the seam with a fingertip or modeling tool.
- If needed, use only a trace of water to help smooth the surface.
- If the crack returns immediately, correct the uneven thickness or weak join instead of adding more water.
If the Clay Is Leather-Hard or Partly Dry
A small surface crack may accept a little paste made from the same clay and a controlled amount of water, if the product permits it. Work the matching material into the gap, remove the excess, and blend the edges. Let the repair dry gradually before deciding whether it needs another thin application.
A crack that runs through a load-bearing join is different. If movement continues when the part is lightly supported, a cosmetic surface patch is unlikely to last. Rebuilding that area—or remaking the piece with a stronger design—may be the better choice.
If the Piece Is Fully Dry
- Remove loose crumbs with a soft, dry brush.
- Fill a stable crack with a small amount of fresh matching clay or the repair material recommended by the manufacturer.
- Press the filler into the gap rather than laying it only across the top.
- Smooth the edges with minimal moisture.
- Let the repair dry fully. Repeat with a thin second fill if shrinkage leaves a shallow line.
- Lightly refine the surface only if sanding is allowed by the product instructions; an adult should manage dust and use suitable protection.
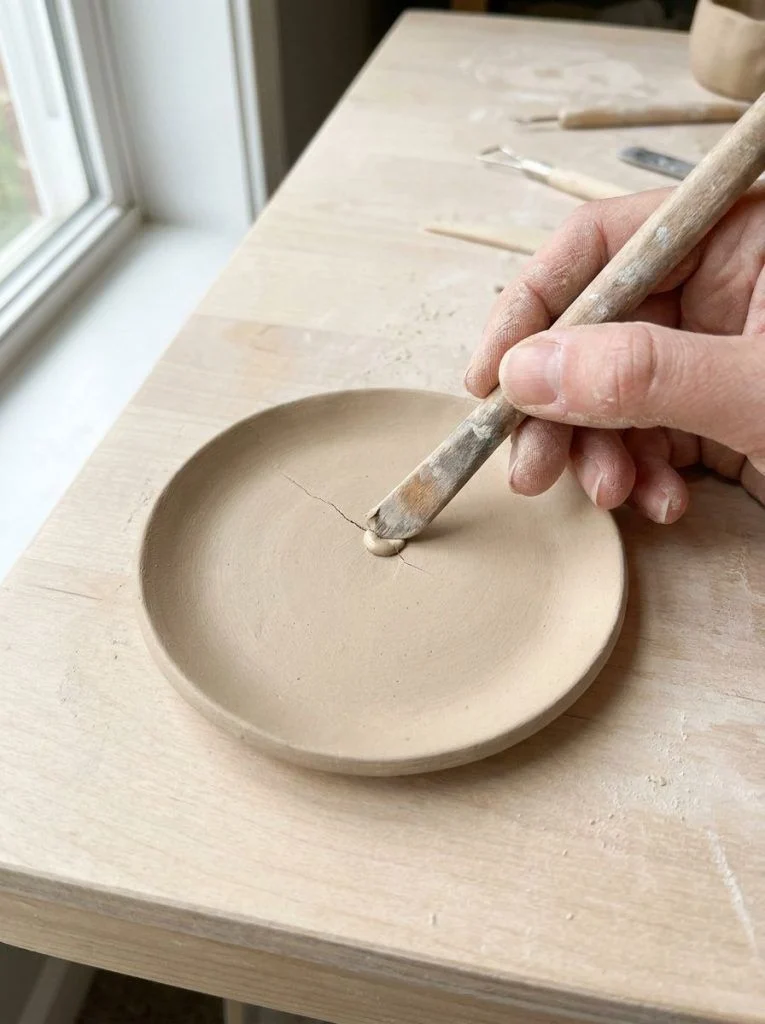
This approach is consistent with Crayola’s product-specific repair guidance, which suggests smoothing small cracks with a few drops of water or filling them with a little wet clay, while warning that results depend on the severity. Mont Marte also recommends filling cracks with a wet mixture of the same clay for its product. Always defer to the directions for the clay you actually used.
When to Repair and When to Remake
Repair is worthwhile when the crack is narrow, stable, and mainly cosmetic. Remaking is often safer when the clay is crumbling throughout, a structural split keeps moving, a thin handle has broken at several points, or the project must carry weight. A patch cannot correct a weak overall design.
For a child, remaking does not have to feel like failure. The cracked piece has already shown exactly where to make the next version thicker, lighter, rounder, or better supported. Keep the lesson specific: “Let’s make this handle shorter and blend a wider base” is more useful than “Be more careful.”
Painting and Sealing Without Trapping Moisture
Paint only after the repaired project is dry all the way through. Apply light coats and let each coat dry. If you choose a sealer, make sure it is compatible with both the clay and the paint, and have an adult follow its ventilation and safety directions.
A decorative sealer can reduce surface wear, but it does not automatically turn air-dry clay into a waterproof, washable, food-safe, or outdoor-safe material. Use finished children’s projects as decorations, keepsakes, pretend-play accessories, or dry-item holders unless the exact product system is rated for another purpose.
Air-Dry Clay Cracking FAQ
Does more water stop air-dry clay from cracking?
Not necessarily. A tiny amount can help smooth a surface or join compatible clay, but too much can make the outer layer wetter than the center, weaken details, and increase uneven shrinkage. Use the minimum needed and follow the label.
Can I dry air-dry clay in the oven?
Only if the exact manufacturer explicitly provides oven directions for that exact product. Many air-dry clays are intended to harden at room temperature, and forced heat can dry the outside too quickly or damage the material. Do not use a generic online temperature for an unidentified clay.
Why does my air-dry clay crack around the edges?
Edges are often thinner and more exposed to moving air, so they lose moisture before the center. Make the slab more even, avoid feather-thin rims, compress cut edges, and use a gentler drying location.
Why does a repaired crack come back?
The piece may still be shrinking, the crack may be under structural tension, or the filler may be much wetter than the surrounding clay. Let the piece stabilize, support the area, and correct the underlying join or thickness problem before filling again.
Can I paint over a crack?
Paint can disguise a hairline but will not strengthen a moving crack. Repair first, let the filler dry completely, then repaint the area. Painting too soon may hide moisture and make later changes harder to see.
Knowing how to stop air-dry clay from cracking also makes it easier to choose the right repair method.
A Simple No-Crack Routine
Use fresh, workable clay; build with even thickness; hollow bulky forms where appropriate; score and blend every attachment; and add as little water as possible. Then dry the project gradually at room temperature according to its label, allowing air to reach each side before painting.
If a crack still appears, treat it as a diagnosis rather than covering it immediately. Fixing the cause first is what makes the repair last. For more screen-free projects that use simple household supplies, explore our kids crafts collection.