8 Clay Craft Ideas: Fun and Easy Projects for Kids at Home
Crafting with kids isn’t just a way to fill an afternoon — it’s a hands-on journey of creativity and discovery. Melted crayon projects, puffy paint crafts, and holiday-themed activities have all had their turn on the blog, but one material has been missing until now: clay.
At first glance, clay might look a lot like play dough, but it behaves quite differently — both in texture and in how well it holds a shape. That makes it perfect for projects that need real structure and detail, giving kids something that actually lasts. And there’s nothing quite like the pride on a child’s face when they get to keep what they made.
The good news is you don’t need fancy tools or art-school experience to get started. Below you’ll find a breakdown of the different clay types, eight simple project ideas, and an easy step-by-step guide to help you get crafting with just a bit of patience and enthusiasm.

8 Clay Craft Ideas for Kids
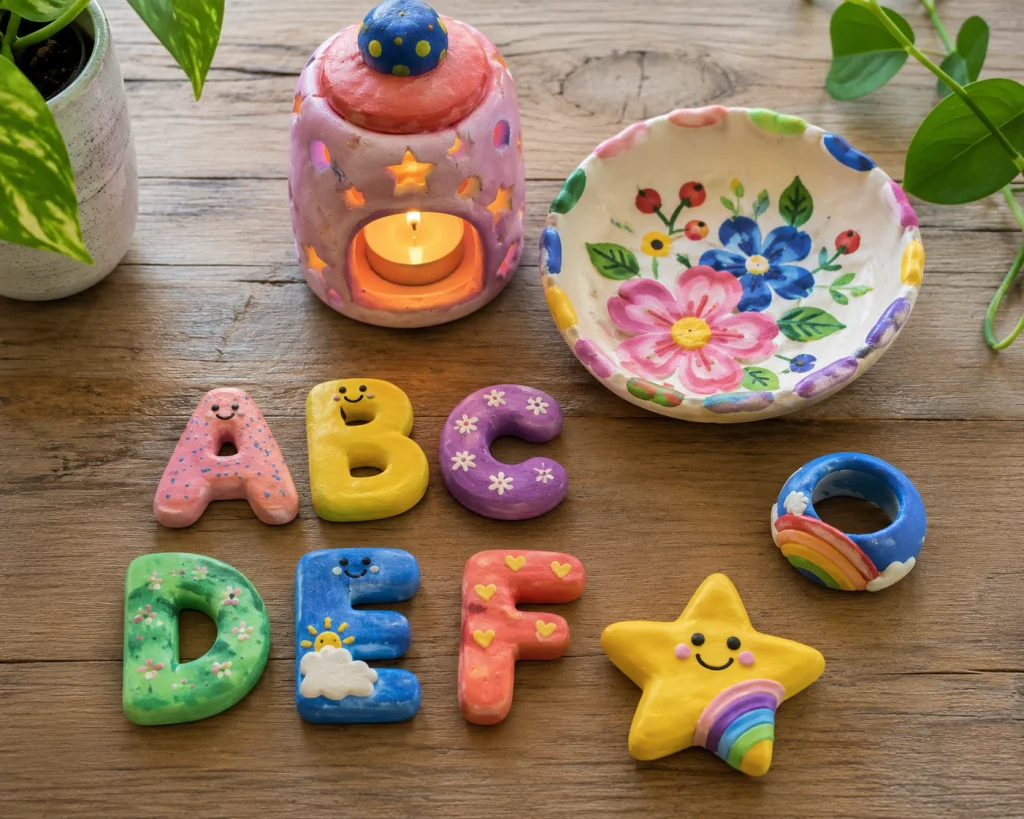
Alphabet Fridge Magnets Press a mini alphabet cookie cutter into the clay, let it dry, then have your kid decorate it however they like. Hot-glue a small magnet to the back and it’s ready for the fridge.
Decorated Flower Pot Skip the tricky part and start with a plain ceramic pot. Let your kids go wild decorating it with air-dry clay shapes and designs, then use it as a real planter afterward.
Holiday Ornaments Roll the clay flat and use a holiday-shaped cookie cutter to cut out festive designs. Once dry, kids can add whatever embellishments they want.
DIY Clay Lanterns Wrap an old mason jar in colorful clay, then use a plastic knife or cookie cutter to cut out fun shapes. Pop in a tea light and watch it glow.
Trinket Dish Roll white clay into any shape your kid likes. Once it dries, they can paint it — try lining the edges with metallic paint for an extra special touch.
Dino Fossils Flatten white clay into circles, press plastic dinosaur figures in, remove them after a few minutes, and let the clay dry for instant DIY “fossils.”
Colorful Clay Rings Cut a thin strip of clay sized to your child’s finger, join the ends together, let it dry, and decorate — an easy handmade ring.
Fruit Coasters Flatten and cut out a circle of clay, let it dry, then have your kids paint different fruits on it. Great as a coaster or just a cute decoration.
Which Clay Is Best for Crafts? A Simple Skill-Level Guide
The right clay really depends on what you’re making. Here’s a quick rundown of the options:
Air-dry clay is generally the easiest medium for kids — soft, pliable, and requiring no special equipment. It just needs 24-72 hours to dry naturally once the project is done.
Oil-based clay (also called plasticine or modeling clay) never actually hardens, so kids can reshape their creations endlessly. Because it doesn’t set, it’s strictly for play and skill-building rather than keepsakes.
Polymer clay is the go-to for decorative items. Under adult supervision it’s kid-friendly, non-toxic, durable once baked, and comes in plenty of bright colors — though it does need to go in the oven to cure.
Pottery clay is more of a “take a class for this” material — heavier, firmer, and requiring special tools plus kiln firing. Great for big sculptures, but not really practical at home.
Play dough, while technically not clay, is a simple and forgiving alternative if you’re not ready to commit to the real thing yet.

How to Make Clay Crafts at Home: Step-by-Step
- Choose the right clay for your child’s age and skill level — air-dry, polymer, and oil-based clay are all solid options.
- Decide what to make. For younger kids, open-ended exploration is more than enough. For older kids, sketch out a simple plan — polymer clay suits detailed, durable pieces like jewelry, while air-dry clay works well for small ornaments and dishes.
- Prep the workspace. Cover surfaces beforehand, especially with polymer clay, since it can stain (and pick up stains too).
- Gather simple tools — plastic knives, rolling pins, cookie cutters, and toothpicks — before you start so there’s no mid-project scramble.
- Encourage free creativity. Let kids squeeze, squish, and explore the texture on their own terms.
- Work in small sections, especially with younger children, to keep frustration low and smiles high.
- Finish and decorate once the clay has dried — painting, glazing, or adding embellishments as they like.
- Clean up together — washing tools and storing leftover clay is part of the fun too.

Final Thoughts
Clay is an ideal material for kids — easy to shape, fun to play with, and perfect for creating keepsakes they’ll be proud to show off. It’s simple enough for a rainy afternoon at home, yet rewarding enough to turn into a lasting memory.